It was time for a major clean out of my daughter's boho meets hippie chic bedroom. She's 10, she's crafty and she likes to hang on to a lot of stuff.
We carried out 6 laundry baskets of clothes, toys and various flotsam and jetsam. We brought back only what would fit into the 3 small baskets, one IKEA closet stacker and bookshelf we already had.
She's mostly replaced the daily usage of toys with nail polish and vogue magazine. But the stuffed animals and American Girl remain. She's on the cusp of learning to build her own life, still cataloging the remnants of the one I built for her. So while the deep clean needed to be done and wasn't an act chosen out of sentimentality of any kind, I found my sentimental self within it.
Here is her room, refreshed and lovely. Frosted in signs of a girl on the edge of being a grown-up.
Showing posts with label home decor. Show all posts
Showing posts with label home decor. Show all posts
Sunday, September 23, 2012
Saturday, April 28, 2012
I'm back . . .
It's been a super crazy few months. I think I am finally shaking off the ick of the past few months and I'm ready to get back to my normal/strange self.
I have a little random, minimally planned, overly ambitious, craftiness to share. It is my hope that this post will refresh me! I plan to get back in the groove, and move forward with all my household projects, which have all been sadly neglected since February or so.
So here it is: When we first moved into this house, I immediately had a plan on how I would be decorating the entry way. I wanted it to be eye catching and interesting and fun. My plan involved repurposing some ledge shelves from our previous home, framed photos and Fiestaware. It would have been great.
But then, a friend and I (during a night of home decor, via text message) came up with a different idea.
We found this wallpaper online and admired it, heartily. I thought it over. $45 a roll, plus install. Not too bad. It's not that large of an area. But something else struck me pretty quickly, "What if I just drew it on the wall with a sharpie?" Yes! That's what I'll do. Since, you know, that's how sharpies are meant to be used.
And that is what I did.
I started with a fresh coat of white paint and then went to town with a medium point sharpie. I started out using various sizes of books as templates, but eventually threw that plan out the window and freehanded it. It's intentionally imperfect, because perfection is outside of my realm.
I didn't take any photos during the process, so I'll just share the finished product with you.
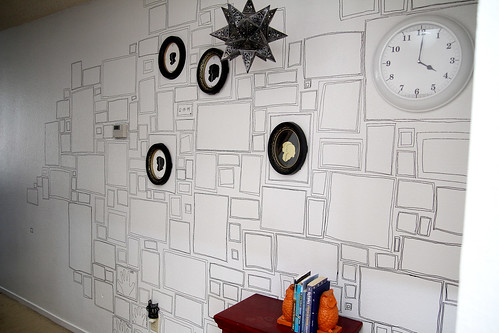
All the decor and accessories are things I already owned, and for the most part it's the same stuff that was here before I redid the wall. I am considering replacing the books and bookends with a vase and single large flower. We'll see.
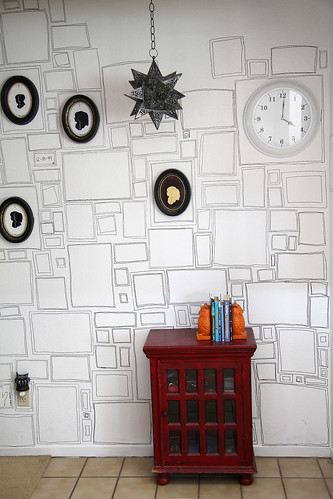
I decided not to fill the entire wall in, yet. I might go back and finish it someday, sometime. But for now I like it a little asymmetrical and unfinished.
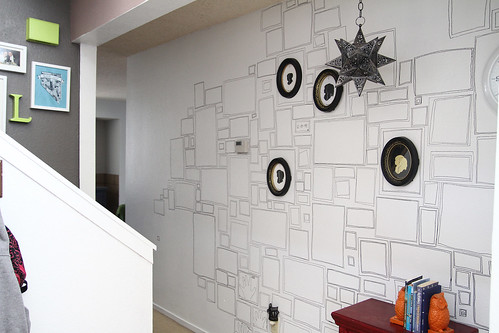
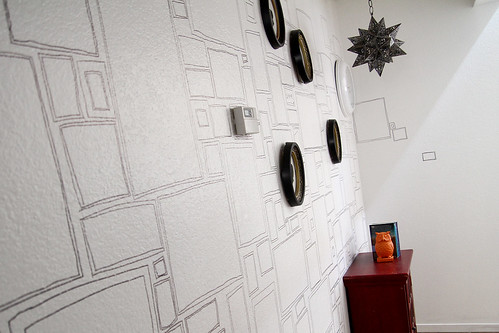
That's it.
I used a little over a half gallon of off-the-shelf white paint from Lowes, and one medium point sharpie. My calculations say this was about a $10-ish project.
There you have it! A short and sweet little something. I'm here, just plugging away. I bought a cool chair for $7 at the SPCA thrift store yesterday. Maybe it will be the material for my next post!
I have a little random, minimally planned, overly ambitious, craftiness to share. It is my hope that this post will refresh me! I plan to get back in the groove, and move forward with all my household projects, which have all been sadly neglected since February or so.
So here it is: When we first moved into this house, I immediately had a plan on how I would be decorating the entry way. I wanted it to be eye catching and interesting and fun. My plan involved repurposing some ledge shelves from our previous home, framed photos and Fiestaware. It would have been great.
But then, a friend and I (during a night of home decor, via text message) came up with a different idea.
We found this wallpaper online and admired it, heartily. I thought it over. $45 a roll, plus install. Not too bad. It's not that large of an area. But something else struck me pretty quickly, "What if I just drew it on the wall with a sharpie?" Yes! That's what I'll do. Since, you know, that's how sharpies are meant to be used.
And that is what I did.
I started with a fresh coat of white paint and then went to town with a medium point sharpie. I started out using various sizes of books as templates, but eventually threw that plan out the window and freehanded it. It's intentionally imperfect, because perfection is outside of my realm.
I didn't take any photos during the process, so I'll just share the finished product with you.

All the decor and accessories are things I already owned, and for the most part it's the same stuff that was here before I redid the wall. I am considering replacing the books and bookends with a vase and single large flower. We'll see.

I decided not to fill the entire wall in, yet. I might go back and finish it someday, sometime. But for now I like it a little asymmetrical and unfinished.


That's it.
I used a little over a half gallon of off-the-shelf white paint from Lowes, and one medium point sharpie. My calculations say this was about a $10-ish project.
There you have it! A short and sweet little something. I'm here, just plugging away. I bought a cool chair for $7 at the SPCA thrift store yesterday. Maybe it will be the material for my next post!
Friday, January 13, 2012
Re: My dining chairs
As a creative person who often acts on whims I sometimes experience a feeling we're going to call "Crafter's Remorse."
You know, spray painting those candle holders chartreuse sounded brilliant, but now that I look at them . . .
and so on.
And I guess I wouldn't have been able to believe it if I hadn't felt a tiny sense of regret over my table refinishing project. I never regretted refinishing the table, itself. It needed to be done either way, the table was a wreck. But when the table and chairs were back in the same room the whole thing felt a little Furniture Store to me.

More Matchy-Matchy than Michael Kors and I prefer for things to be.
And maybe pushing toward cottage-y, shabby chic.
Which isn't really where I'm headed.
I'm headed more kind of international country meets modern eclectic. Or something.
So I toyed around with a couple dozen ideas.
Paint the chairs?
Stain the chairs?
Get rid of the chairs entirely?
and so on.
But the chairs are the only quality furniture we own, and I just got done with a biiiiig refinishing project. So I went to look at fabric, for the 3 chairs with cushions.
I knew I wanted something colorful. Something that kind of reminds you of hand painted Mexican pottery or tile.
I found this almost immediately.

And I loved it.
BUT it was $45 a yard. Unsure if 1 yard would cover 3 cushions, I hemmed and hawed. I thought it over. I lamented.
Ultimately I decided that it was not in my budget.
And then went to the clearance racks, where I found a whole lot of garbage but then, buried and alone in the bottom of a pile, I found this

and for only $6 a yard.
Perfect.
And even more perfect when I got to the cutting table and the employee told me there was an additional 50% off the clearance racks right now!
So I bought all that was left on the bolt, about 2 1/2 yards, for $7 and change. Yaaaaaay!
Then I brought it home and did this:
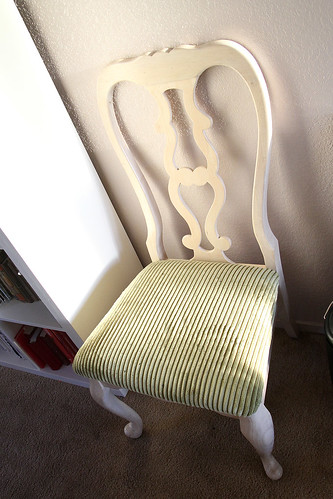

I still love you green cushions! You just don't work in my room anymore!
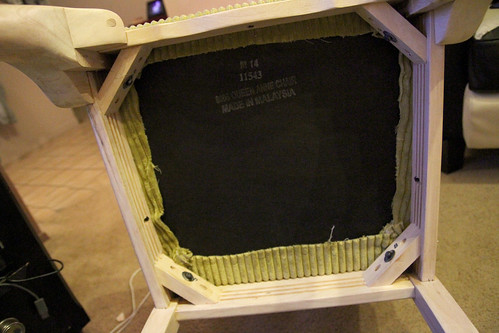

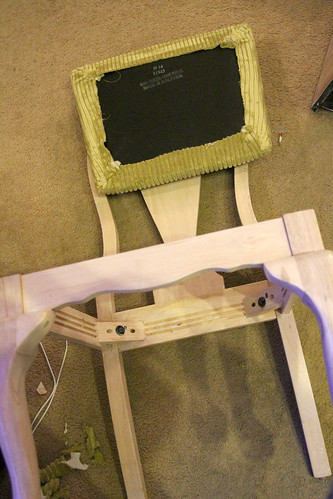
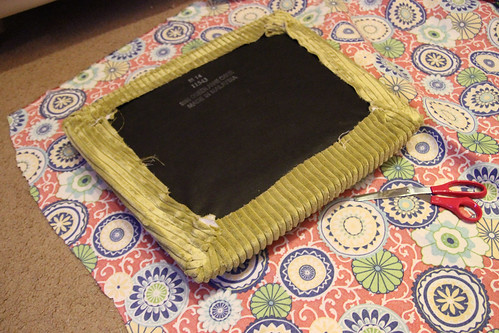


I bought the staple gun at the fabric store. It was about $20.
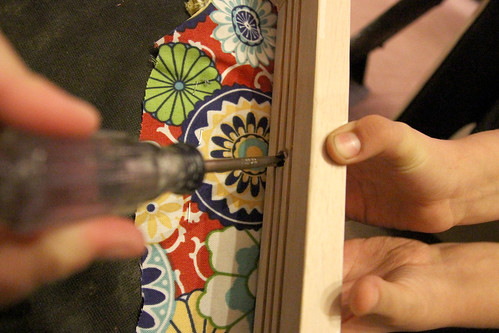
A little boy is the perfect helper when reattaching the seats.
And just like that! They're all done.
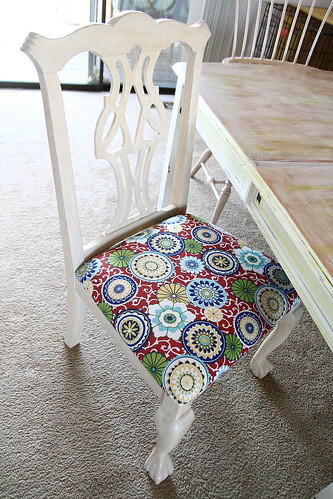


All told the project took me about 5 hours to complete. Mostly because I removed the green fabric from the first chair I covered and that took FOREVER. So I decided to just cover over it for the other two.
I love the new cushions! What do you think?
You know, spray painting those candle holders chartreuse sounded brilliant, but now that I look at them . . .
and so on.
And I guess I wouldn't have been able to believe it if I hadn't felt a tiny sense of regret over my table refinishing project. I never regretted refinishing the table, itself. It needed to be done either way, the table was a wreck. But when the table and chairs were back in the same room the whole thing felt a little Furniture Store to me.

More Matchy-Matchy than Michael Kors and I prefer for things to be.
And maybe pushing toward cottage-y, shabby chic.
Which isn't really where I'm headed.
I'm headed more kind of international country meets modern eclectic. Or something.
So I toyed around with a couple dozen ideas.
Paint the chairs?
Stain the chairs?
Get rid of the chairs entirely?
and so on.
But the chairs are the only quality furniture we own, and I just got done with a biiiiig refinishing project. So I went to look at fabric, for the 3 chairs with cushions.
I knew I wanted something colorful. Something that kind of reminds you of hand painted Mexican pottery or tile.
I found this almost immediately.

And I loved it.
BUT it was $45 a yard. Unsure if 1 yard would cover 3 cushions, I hemmed and hawed. I thought it over. I lamented.
Ultimately I decided that it was not in my budget.
And then went to the clearance racks, where I found a whole lot of garbage but then, buried and alone in the bottom of a pile, I found this

and for only $6 a yard.
Perfect.
And even more perfect when I got to the cutting table and the employee told me there was an additional 50% off the clearance racks right now!
So I bought all that was left on the bolt, about 2 1/2 yards, for $7 and change. Yaaaaaay!
Then I brought it home and did this:


I still love you green cushions! You just don't work in my room anymore!


I bought the staple gun at the fabric store. It was about $20.

A little boy is the perfect helper when reattaching the seats.
And just like that! They're all done.


All told the project took me about 5 hours to complete. Mostly because I removed the green fabric from the first chair I covered and that took FOREVER. So I decided to just cover over it for the other two.
I love the new cushions! What do you think?
Thursday, January 5, 2012
Chapter 3, wherein we conclude the adventures of a 6 year old table that wished it was 100!
Or something . . .
I'm working on the titles.
Remember how I sanded the table? And then I did a lot of other stuff to it?
Well, after that, my dad (the boss of all wood involved projects) offered to spray the finish on my table for me.
Who am I to turn down an offer like that?
I want to stress, though, that I certainly would have simply finished it on my own, if he hadn't offered. While the fact that the finish was, in the end, sprayed on the table did make the process much easier and faster, but it certainly would have been doable without the help.
After assisting with loading the table into my dad's truck, riding along as he drove it to his house, and assisting in the unloading of the table, my work was pretty straightforward and simple from there on out.
Watch my dad do one final sanding with his sander that works significantly faster and better than mine.
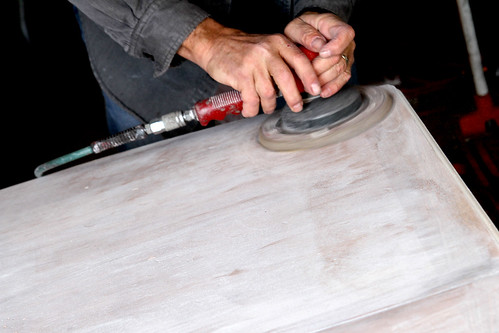
I had intended to do this myself, but it literally took him four minutes to do one final finish sanding. I love how the wood shows through just a bit. Perfect!
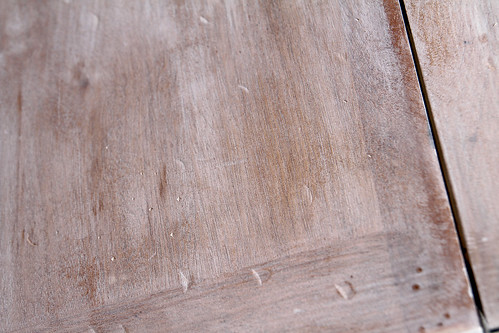
While he did wood-guy things in the garage I used his pretty awesome wood-guy's scraper to distress the legs and edges of the table top. I ended up liking just the scraper and never did end up doing any distressing with the sander.
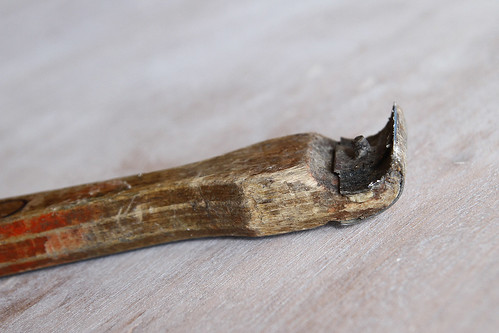
After the legs, table edges and base were distressed
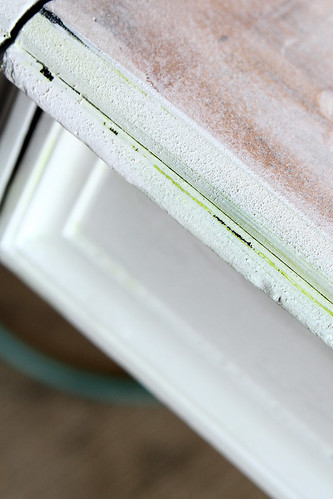
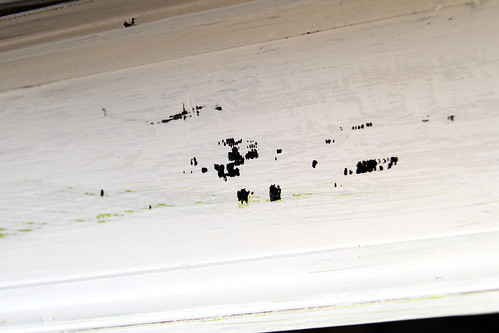
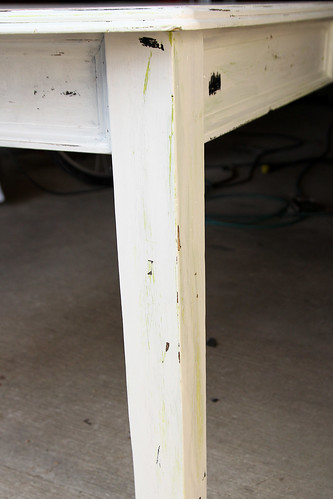
the two of us got a little creative!
Dad mixed some chartreuse-ish paint tints with paint thinner. (He says paint in the color you like and whatever the packaging says to use to thin it would work the same. The tints were just used because he already had them on hand.) Then, just dabbing the edge of a rag in the tint, and blotting it thoroughly, he ever-so-gently wiped the color on to the table top in places. He also wiped a little of it around the white rim.
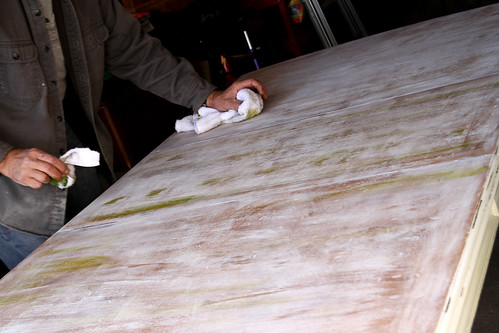
I ended up absolutely loving this effect because it makes the green on the legs really sing. You'd have to see it in person, but I feel like the green in the distressing is so much more noticible because of the tint on the table top.
After a little more drying time, cleaning all the dust away, and putting the table up on cinder blocks in the driveway he sprayed the first of three coats of finish on the table.
We used Minwax brand finish in "natural", applied with an automotive spray gun. Of course this could have been done with a brush. But if you know someone who has the ability to spray something for you, I highly recommend it. It was a snap to finish. Each coat took about 5 minutes to apply. Additional coats can be applied once the finish is mostly dry, unlike staining with a brush, where you have to wait until each coat is totally dry before reapplying.
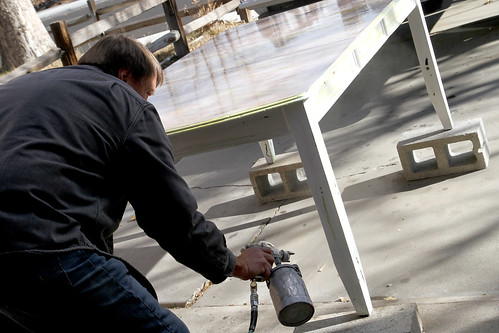
We let it dry about 1-2 hours after the first coat, and 20 minutes between the other two.
And that was it.
It was left to dry overnight, in the heated garage. The next day he brought it back to me, looking all pretty and stuff.

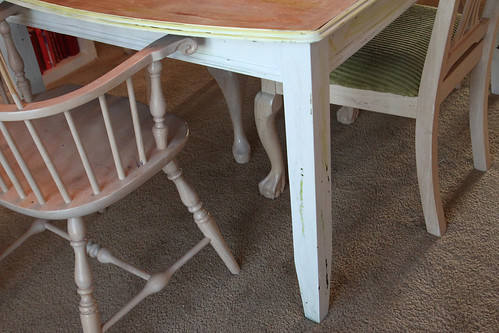
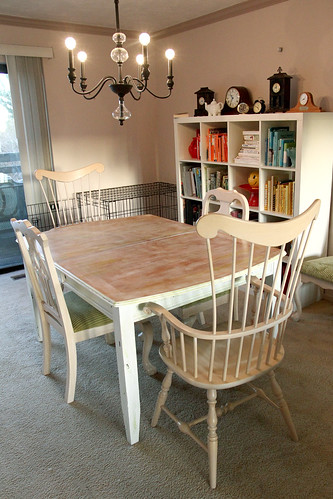
And that's it . . . for now.
My confession is that I have already done a little something else to this room, because after the table was redone I felt a little too shabby chic and not enough ecclectic chic.
I'll share that project soon.
I'm working on the titles.
Remember how I sanded the table? And then I did a lot of other stuff to it?
Well, after that, my dad (the boss of all wood involved projects) offered to spray the finish on my table for me.
Who am I to turn down an offer like that?
I want to stress, though, that I certainly would have simply finished it on my own, if he hadn't offered. While the fact that the finish was, in the end, sprayed on the table did make the process much easier and faster, but it certainly would have been doable without the help.
After assisting with loading the table into my dad's truck, riding along as he drove it to his house, and assisting in the unloading of the table, my work was pretty straightforward and simple from there on out.
Watch my dad do one final sanding with his sander that works significantly faster and better than mine.

I had intended to do this myself, but it literally took him four minutes to do one final finish sanding. I love how the wood shows through just a bit. Perfect!

While he did wood-guy things in the garage I used his pretty awesome wood-guy's scraper to distress the legs and edges of the table top. I ended up liking just the scraper and never did end up doing any distressing with the sander.

After the legs, table edges and base were distressed


the two of us got a little creative!
Dad mixed some chartreuse-ish paint tints with paint thinner. (He says paint in the color you like and whatever the packaging says to use to thin it would work the same. The tints were just used because he already had them on hand.) Then, just dabbing the edge of a rag in the tint, and blotting it thoroughly, he ever-so-gently wiped the color on to the table top in places. He also wiped a little of it around the white rim.

I ended up absolutely loving this effect because it makes the green on the legs really sing. You'd have to see it in person, but I feel like the green in the distressing is so much more noticible because of the tint on the table top.
After a little more drying time, cleaning all the dust away, and putting the table up on cinder blocks in the driveway he sprayed the first of three coats of finish on the table.
We used Minwax brand finish in "natural", applied with an automotive spray gun. Of course this could have been done with a brush. But if you know someone who has the ability to spray something for you, I highly recommend it. It was a snap to finish. Each coat took about 5 minutes to apply. Additional coats can be applied once the finish is mostly dry, unlike staining with a brush, where you have to wait until each coat is totally dry before reapplying.

We let it dry about 1-2 hours after the first coat, and 20 minutes between the other two.
And that was it.
It was left to dry overnight, in the heated garage. The next day he brought it back to me, looking all pretty and stuff.


And that's it . . . for now.
My confession is that I have already done a little something else to this room, because after the table was redone I felt a little too shabby chic and not enough ecclectic chic.
I'll share that project soon.
Wednesday, January 4, 2012
How to make your not-old table look not-new. (part 2)
Ok, so when last I wrote we were discussing how to make a dining table that looks like this:
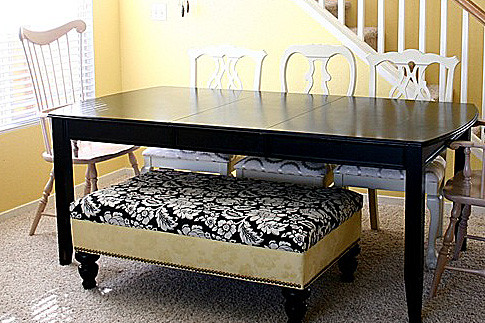
look like this:

We talked about all the many years of sanding in the last post. Which, after I posted, I thought "Sheesh, Emily. You probably could have dealt with that in a couple sentences!"
But the good news is, I was thorough.
So after I had completely rid the table of it's painted top, I took some help from the family and gave it a little bit of a beating.
We made little x shaped divots in patches here and there by placing the point of a phillips head screwdriver on the table top and tapping it once or twice with a hammer. Don't let your husband, or any adult male tap the hammer twice or you will get the largest x shaped divot ever. Men are not subtle when it comes to hammers. We also created lots and lots and lots of crescent moon shaped hammer head marks, everywhere.
Children like to beat furniture, they'll do it for you with no complaint at all. Husbands will get a little carried away and possibly need to be told to slow down.
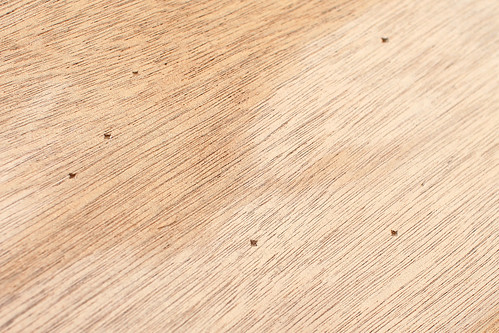
The hammer marks were difficult to see before the finish process highlighted them. I'll post another photo of that below.
After the abuse, I cleaned the table top off with a dry towel (canned air would be perfect for this) and applied two coats of polyurethane with a sponge brush.
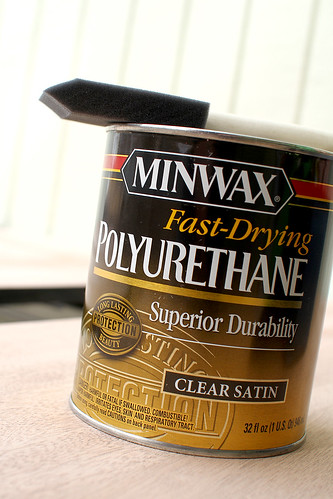
Since I knew that I wanted the wood to show through the paint, I elected to use this particular product to deepen the wood color, before I started painting. I never would have thought to do this if it weren't for this post from The Lettered Cottage. So Layla gets all the credit on that one.
I did two coats of poly, allowing it to dry a couple of hours between each coat.
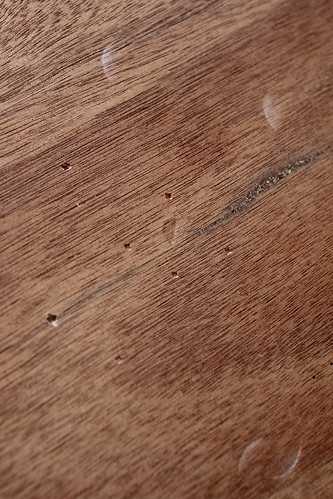
The distressing was a little more visible after the poly went on.
You can also see a spot there where the veneer was totally gone, as well as a fresh hammer mark or two that we added after we did the poly. We just felt like it needed a few more. (Don't forget how husbands like to hit tables with hammers, he couldn't help himself.)
After two coats of polyurethane the table looked like this:

You can see in the above photo that I attempted to sand the edges of the table down, only to discover that the edges of the table were terrible and awful and apparently made of paper, or possibly cow patties and straw. I don't actually know what they're made of, but while sanding the material kind of just crumbled off. The legs were also made of this material.
After some thought and semi-careful planning I decided I would go ahead and paint the edge of the table white, just as I planned to do with the base. All I did to prep the legs was a super light rough-up with the sander, just so the paint would stick.
I think I did about 3 coats of white paint, alternating with the 2 coats of poly I did on the table top, thereby reducing my down time. As it worked out I ended up working outside on the table for pretty much the entire day.
After a couple coats of white, most of the black was covered and the edge was looking much nicer.
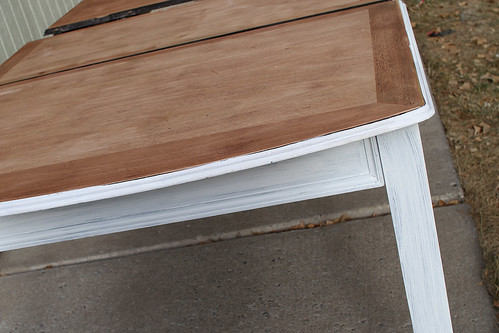
See the brush marks on the legs?
I wasn't particularly worried about those. I had plans for the legs, that involved making them look much worse (which is also better, right?) than a few brush strokes made them look.
When most of the black was covered I pulled out my secret weapon.
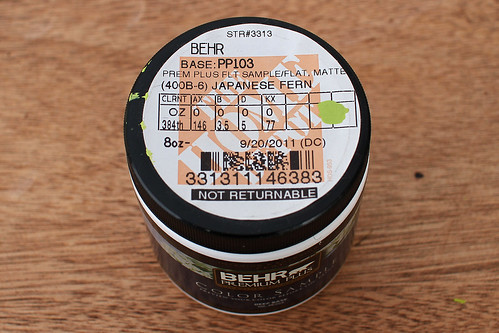
A tiny little tester pot of Japanese Fern by Behr. I purchased this several moths ago as a tester for my bathroom linen closet door, but since I've yet to test anything, it's just been sitting around the house waiting to be used. I definitely hadn't planned to use this particular paint on this particular table, but when the idea hit me I was excited, so I went to town.
I painted the green in patches all over the edges and base of the table.
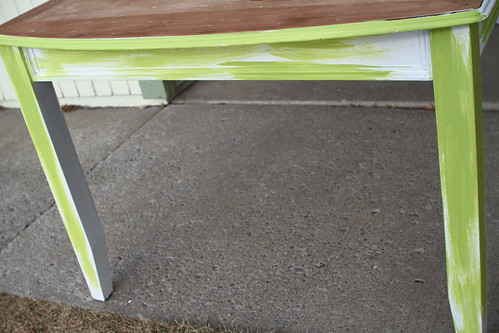
After I let the green patches dry I painted another good full-coverage coat of white over that. All of this was done, of course, with the intention for it to show through later when I distressed the legs and base of the table. You can't see it in the after photo I've posted, but I have detail photos I'll share later.
For my final step of the day I applied the white wash to the top of the table. I used off the shelf white from Home Depot, that I already had on hand. Mixing about half water and half paint in a mason jar, I made approximately 16 times more white wash than I needed. Just so you know.
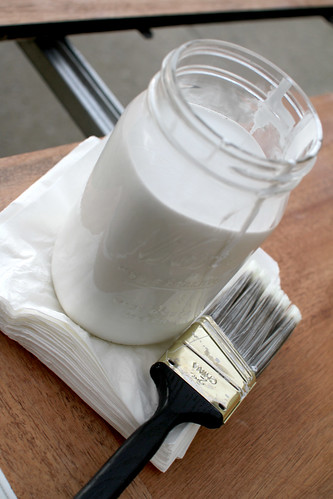
Since the very wet water and paint mixture goes on super wet, I decided I would actually drizzle wet paint on the table in sections. Then I used a pretty gnarly looking, cheapo, dry paint brush to smear it around on the table top, thereby leaving streaks in the top and allowing the wood to show through. I brushed the paint in the direction of the grain making sure to leave sections of thick paint and sections of thin paint.
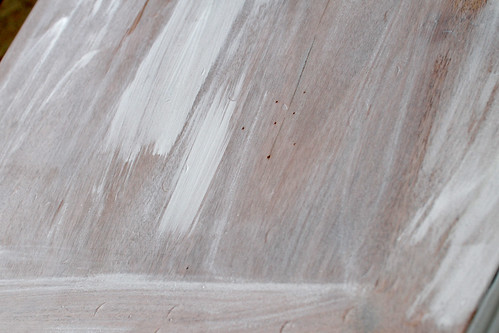
The process of covering the table top went very fast and before I knew it was covered.
When I put the table up for the night, it looked like this:
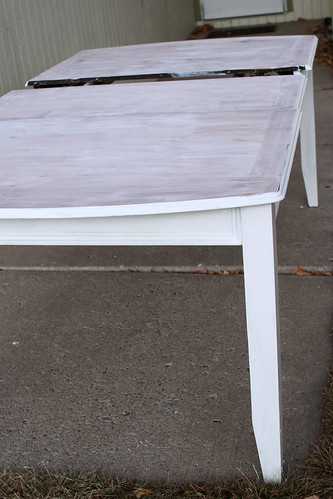
Tomorrow, I'll post the conclusion of this project! And for now I'll tell you that I just totally love my new table a whole lot. I'm so thrilled to have been able to actually do this!

look like this:

We talked about all the many years of sanding in the last post. Which, after I posted, I thought "Sheesh, Emily. You probably could have dealt with that in a couple sentences!"
But the good news is, I was thorough.
So after I had completely rid the table of it's painted top, I took some help from the family and gave it a little bit of a beating.
We made little x shaped divots in patches here and there by placing the point of a phillips head screwdriver on the table top and tapping it once or twice with a hammer. Don't let your husband, or any adult male tap the hammer twice or you will get the largest x shaped divot ever. Men are not subtle when it comes to hammers. We also created lots and lots and lots of crescent moon shaped hammer head marks, everywhere.
Children like to beat furniture, they'll do it for you with no complaint at all. Husbands will get a little carried away and possibly need to be told to slow down.

The hammer marks were difficult to see before the finish process highlighted them. I'll post another photo of that below.
After the abuse, I cleaned the table top off with a dry towel (canned air would be perfect for this) and applied two coats of polyurethane with a sponge brush.

Since I knew that I wanted the wood to show through the paint, I elected to use this particular product to deepen the wood color, before I started painting. I never would have thought to do this if it weren't for this post from The Lettered Cottage. So Layla gets all the credit on that one.
I did two coats of poly, allowing it to dry a couple of hours between each coat.

The distressing was a little more visible after the poly went on.
You can also see a spot there where the veneer was totally gone, as well as a fresh hammer mark or two that we added after we did the poly. We just felt like it needed a few more. (Don't forget how husbands like to hit tables with hammers, he couldn't help himself.)
After two coats of polyurethane the table looked like this:

You can see in the above photo that I attempted to sand the edges of the table down, only to discover that the edges of the table were terrible and awful and apparently made of paper, or possibly cow patties and straw. I don't actually know what they're made of, but while sanding the material kind of just crumbled off. The legs were also made of this material.
After some thought and semi-careful planning I decided I would go ahead and paint the edge of the table white, just as I planned to do with the base. All I did to prep the legs was a super light rough-up with the sander, just so the paint would stick.
I think I did about 3 coats of white paint, alternating with the 2 coats of poly I did on the table top, thereby reducing my down time. As it worked out I ended up working outside on the table for pretty much the entire day.
After a couple coats of white, most of the black was covered and the edge was looking much nicer.

See the brush marks on the legs?
I wasn't particularly worried about those. I had plans for the legs, that involved making them look much worse (which is also better, right?) than a few brush strokes made them look.
When most of the black was covered I pulled out my secret weapon.

A tiny little tester pot of Japanese Fern by Behr. I purchased this several moths ago as a tester for my bathroom linen closet door, but since I've yet to test anything, it's just been sitting around the house waiting to be used. I definitely hadn't planned to use this particular paint on this particular table, but when the idea hit me I was excited, so I went to town.
I painted the green in patches all over the edges and base of the table.

After I let the green patches dry I painted another good full-coverage coat of white over that. All of this was done, of course, with the intention for it to show through later when I distressed the legs and base of the table. You can't see it in the after photo I've posted, but I have detail photos I'll share later.
For my final step of the day I applied the white wash to the top of the table. I used off the shelf white from Home Depot, that I already had on hand. Mixing about half water and half paint in a mason jar, I made approximately 16 times more white wash than I needed. Just so you know.

Since the very wet water and paint mixture goes on super wet, I decided I would actually drizzle wet paint on the table in sections. Then I used a pretty gnarly looking, cheapo, dry paint brush to smear it around on the table top, thereby leaving streaks in the top and allowing the wood to show through. I brushed the paint in the direction of the grain making sure to leave sections of thick paint and sections of thin paint.

The process of covering the table top went very fast and before I knew it was covered.
When I put the table up for the night, it looked like this:

Tomorrow, I'll post the conclusion of this project! And for now I'll tell you that I just totally love my new table a whole lot. I'm so thrilled to have been able to actually do this!
Subscribe to:
Posts (Atom)


