Monday, October 1, 2012

Maybe a Bigger Job Than I Imagined

Last year I made one measly jar of apple sauce from a $12-ish bag of organic apples from Whole Foods.  I canned the dumb thing, then opened it the next day.  It was incredibly delicious, but a lot of work (and a lot of money) for such a small harvest.

Determined to one-up my applesauce performance, from last year, I made tentative plans to head to an apple farm outside of town and pick a bushel of my very own.  My tentative plans were thrust into reality when a friend invited us to join her in a day of apple picking.  Awesome!  The fact that the apples were a) in town and b) free, made it all the more appealing. 

But, I didn't exactly realize what I was getting myself into. 


And what was I getting myself into, you ask?

Apples.

UP. TO. MY. ARMPITS.

Before we could address the cooking and preparation of said apples, we had to pick them.  The trees live in the front yard of a woman who works full time and hasn't the time or inclination to deal with ten gazillion pounds of apples.  We were doing her a favor, as she was, us. 

I'll admit that I had brain-pictures of a darling scene: me, basket in hand, casually reaching up, placing apples delicately into said basket.  I reach to a grocery-store quality apple at shoulder height, I look at it, I smile.  I gaze at my children, as they happily fill their baskets.  We smile.  We are grateful.  Our lives, complete. 

In reality, it was a ton of hard work.  We picked by hand, picked with a telescoping picker, climbed the ladder to pick, shook the tree, gathered, and each of us were beaned in the head at least once.  Then we gathered, cleaned and raked and gathered some more.

It was a long morning of work, but we came home with at least 100 pounds of free fruit!  A blessing, and a lesson, and a day of hard work, all in one.


Stay tuned for recipes, canning shenanigans, et al.

Friday, September 28, 2012

Online, All Day

I think most of us have written a list of things we'd like to accomplish in our lives.

Back in 2003, my first list was inspired by the website www.2dobeforeidie.com.  2007 brought us the term "Bucket list" and one of my favorite bloggers Mighty Girl calls hers a Life List.

My list has seen many incarnations.  Today's lives on Pinterest, you can probably hunt it down there if you'd like to have a look.  It is silly (Tie John Elway's shoes), sentimental (Write letters, like I used to), over ambitious (Kiss an elephant) and everything in between.

I've had my sites set on accomplishing a few of my list items this summer and one of my most simple list items was a pleasure to tackle:

Hang my clothes on the line. 

Why did I want to hang my clothes on the line?  Clothes on the line are so beautiful.  The practice of hanging clothes relaxes me and reminds me of my grandma.  And using electricity to dry clothes when I have a breeze outside that will make them smell amazing and dry them for FREE, is maybe a little wasteful.

So one day this June, the children and I got into our sneakers and walked to our neighborhood supermarket.  At the market we procured the supplies to create our very own clothesline.  Simple clothesline specific rope and wooden clothes pins. The line strung up between the fence and tree as soon as we arrived back home. 

Then, underpants and all, we clipped it to the line. 

Our double line can accommodate a single load of laundry perfectly.  Summer warmth and breezes dry a load in about 45 minutes in our dry climate.  A perfectly peaceful pace.  Easy enough to wash a load or two per day, fold and put away before you even have time to let it pile up again.

 
But, I'll admit, it didn't last long.  The heat came, and brought with it my laziness, and swimming days, and worrying about the automatic sprinklers.  Suddenly the dryer didn't seem so silly after all.  I haven't hung a load out in quite some time, I'm ashamed to admit.  I do a better job of over-complicating my life than I do of simplifying it.  That's the whole truth.

But writing this post has inspired me.  How about a fresh start?  There are plenty of warm days left this month and next.  I commit to myself that I'll hang at least another load or two before the winter comes.  This is me, simplifying, then de-simplifying, then re-simplifying.  Lather. Rinse. Repeat.


Tuesday, September 25, 2012

To Vacation Simply

The other day my husband and I had this talk about how we seem to have lived our vacations in reverse.  We started our marriage with a stupid-expensive 4 day honeymoon to the Bahamas.  It was only in the last year that I realized we could have stayed stateside, for twice as long and half the price. 

It was lovely, we wouldn't change it and all that, but my goodness!

We've secreted away our tax refund each year and taken ourselves on a vacation.  Most of those years we spent every last penny on an all-too-brief visit to Disneyland. 

Here we are so many years later, after having stepped our goals into our new reality and all we ever want to do is go camping.  Our National-Park-to-visit list is growing and we  have become insatiable in the matters of national park camping.  Read on, I'll share the financials of the two options below.

I love Disneyland and I'm confident I'll visit it again someday, but when we first set our eyes on Zion National Park, far off in the distance, after a full day of driving, we were forever changed.

 and the view just keeps getting better.


I really hadn't even looked at pictures of Zion before we went.  I honestly had no idea what to expect.  I booked it because a book I'd bought many years ago about the Grand Canyon included a small section on Zion.  I'd always thought that whenever we decided to go to the Grand Canyon, we'd go to Zion as well.  When we arrived and set up camp none of us could believe what we were seeing.   


Best trip anecdote?  How about how I forgot my camera battery charger at home?  Luckily, my family was just behind us and was able to go into our house and get it for us.  My camera was only dead for half a day.  We don't have the number of Zion photos we'd like, but the photos don't do it justice either way.


Vermilion Cliffs - We didn't make the side trip to actually see Vermilion Cliffs, because I didn't even know it existed until this moment.  So amazingly beautiful.

Our first glimpse of the Grand Canyon.  We came in at sunset and stopped for a moment, before we went to our campground.


Our second glimpse of the Grand Canyon.
 
but
 
wait for  it . . .
 

The fog came in and out all day and it was beautiful.


Bean burritos over the fire = our family's favorite dinner in all of recorded history.  So smoky and delicious!

Moments before I took this photo a woman with a European accent stopped and photographed us sitting by the fire.  She smiled, gave me a thumbs up and said, "very good."  The novelty of our tent and fire pleased her in the motor home laden campground, I think.


So here's the math:

We camped for a total of 4 nights at $18 per night.

We had to purchase a new tent, which when divided over the number of nights we've camped in it so far cost about $8 per night.  The rest of our gear we already had or borrowed.  I'm not calculating the cost of food because whether you're traveling or home, you have to eat.  Camping food is simple and cheap.  (I think I spent about $120 at the grocery store including tons of ice, sodas, chips and other luxury items.  Add that number to my total at the bottom, if you wish.)

Our trip ran a loop of  over 2000 miles (we went to my cousin's wedding afterward), but for the sake of this exercise, I'm just including the camping portion of the trip.  That is 1558 miles of driving at 22 miles per gallon which is $283 in gasoline.

Cost of admission to our national parks varies from park to park.  We purchased an annual family pass for $85.  We were able to use it at least three more times before it expired.  I'll add the whole cost of it to this trip report.

Each of our children chose a souvenir at Zion for a total of $30.  I also sent quite a number of post cards which cost about $15.

We ate out twice while camping (once because of an extreme, sudden downpour), two meals while in Vegas and fast food on the road home as well.  Total cost of those meals: $129

We also stayed in a hotel in Las Vegas on our way home, which was a mere $24 for the one night we stayed.

Everything else we did was entirely free.  Hiking, whittling, et al.

So for our 5 day family vacation, full of fun and memories we spent $662. 


Now, I'll calculate the cost of a similar amount of time on a Disneyland vacation.  We'll consider two travel days and three in-park days, an off-site hotel . . . here goes:

Round trip from my house - $178 in Gasoline

3 day tickets for four: (Disney considers age 10 and up to be adult, so I have to pay adult price on all four tickets now.  Just for the sake of argument, I'm using the cost of two kids tickets and two adult tickets.  I'm also only going to count the price of the 1 park per day tickets, which saves us $120 over park-hopper tickets.  There are sometimes sales or discounts if you buy your tickets at Costco or some other Southern California retailers, so that could save you a bit more) $850

Food: Assume you packed a cooler for the drive both to and from.  Assume you also ate all breakfasts at the hotel and had no extra drinks or snacks.  For the three in-park days you'd spend at least $300 for lunches and dinners.

Souvenirs: That's up to you, you can go crazy or not buy anything.  Assume we didn't buy anything for this trip.

Hotel: Super 8, mid-week, shoulder season, 4 nights at $68 per night

Grand total: $1600

This is what Disneyland would look like on a budget, obviously, you could spend much more than this as well. 


I think both vacation options have their merits.

BUT COME ON!  $662 for a 5 night family trip?  Seriously, that's a screamin' deal!  Try it.  You won't regret it!

Sunday, September 23, 2012

Boho Tween

It was time for a major clean out of my daughter's boho meets hippie chic bedroom.  She's 10, she's crafty and she likes to hang on to a lot of stuff. 

We carried out 6 laundry baskets of clothes, toys and various flotsam and jetsam.  We brought back only what would fit into the 3 small baskets, one IKEA closet stacker and bookshelf we already had.

She's mostly replaced the daily usage of toys with nail polish and vogue magazine.  But the stuffed animals and American Girl remain.  She's on the cusp of learning to build her own life, still cataloging the remnants of the one I built for her.  So while the deep clean needed to be done and wasn't an act chosen out of sentimentality of any kind, I found my sentimental self within it.

Here is her room, refreshed and lovely.  Frosted in signs of a girl on the edge of being a grown-up.


Saturday, September 22, 2012

Apples

It's apple season.

Today I commemorated the occasion with web-surfing related to a theoretical apple picking excursion.  How 21st century of me!  Imagine my elation when free apples were offered by two different people - and the opportunity to pick them on the very day I had planned to make into apple picking day.  I'll call this a small miracle, and be wide-eyed and thankful for it.

                                                                                                                                 Photo courtesy of flickr user msr


I haven't posted in months.  I was on such a roll there for awhile, but everything sort of got set aside.  My parent's separation and ultimate divorce was the cause. It was (and in many ways, remains) a brutally sad time in our lives. 

But it's time for me to move forward.  Building up our lives from where we left them.  It's the first day of autumn and I'm going to start my building with apples.

Saturday, April 28, 2012

I'm back . . .

It's been a super crazy few months. I think I am finally shaking off the ick of the past few months and I'm ready to get back to my normal/strange self.

I have a little random, minimally planned, overly ambitious, craftiness to share. It is my hope that this post will refresh me! I plan to get back in the groove, and move forward with all my household projects, which have all been sadly neglected since February or so.

So here it is: When we first moved into this house, I immediately had a plan on how I would be decorating the entry way. I wanted it to be eye catching and interesting and fun. My plan involved repurposing some ledge shelves from our previous home, framed photos and Fiestaware. It would have been great.

But then, a friend and I (during a night of home decor, via text message) came up with a different idea.

We found this wallpaper online and admired it, heartily. I thought it over. $45 a roll, plus install. Not too bad. It's not that large of an area. But something else struck me pretty quickly, "What if I just drew it on the wall with a sharpie?" Yes! That's what I'll do.  Since, you know, that's how sharpies are meant to be used. 

And that is what I did.

I started with a fresh coat of white paint and then went to town with a medium point sharpie. I started out using various sizes of books as templates, but eventually threw that plan out the window and freehanded it. It's intentionally imperfect, because perfection is outside of my realm.

I didn't take any photos during the process, so I'll just share the finished product with you. 

Entry 1

All the decor and accessories are things I already owned, and for the most part it's the same stuff that was here before I redid the wall.  I am considering replacing the books and bookends with a vase and single large flower.  We'll see.

Front


I decided not to fill the entire wall in, yet. I might go back and finish it someday, sometime. But for now I like it a little asymmetrical and unfinished.

From living room


Looking back

That's it.

I used a little over a half gallon of off-the-shelf white paint from Lowes, and one medium point sharpie.  My calculations say this was about a $10-ish project.

There you have it! A short and sweet little something.  I'm here, just plugging away.  I bought a cool chair for $7 at the SPCA thrift store yesterday.  Maybe it will be the material for my next post!

Tuesday, January 17, 2012

re: Sundance

Someday I'll get to go to the Sundance Film Festival, and actually be able to discuss new documentaries with those in the know.

For now, I'll watch shorts and previews, online. I will also discover that some movies at Sundance are just beyond my personal comfort level. But we can talk about that another time.

Quite possibly the most wacky and maybe bizarre short film, ever:


SO SO SO amazingly beautiful:

The Tsunami and the Cherry Blossom Trailer from Tsunami Blossom on Vimeo.

Friday, January 13, 2012

Re: My dining chairs

As a creative person who often acts on whims I sometimes experience a feeling we're going to call "Crafter's Remorse." 

You know, spray painting those candle holders chartreuse sounded brilliant, but now that I look at them . . .

and so on.

And I guess I wouldn't have been able to believe it if I hadn't felt a tiny sense of regret over my table refinishing project.  I never regretted refinishing the table, itself.  It needed to be done either way, the table was a wreck.  But when the table and chairs were back in the same room the whole thing felt a little Furniture Store to me. 

Home again!

More Matchy-Matchy than Michael Kors and I prefer for things to be.

And maybe pushing toward cottage-y, shabby chic.

Which isn't really where I'm headed.

I'm headed more kind of international country meets modern eclectic. Or something.

So I toyed around with a couple dozen ideas.

Paint the chairs?
Stain the chairs?
Get rid of the chairs entirely?
and so on.

But the chairs are the only quality furniture we own, and I just got done with a biiiiig refinishing project. So I went to look at fabric, for the 3 chairs with cushions.

I knew I wanted something colorful. Something that kind of reminds you of hand painted Mexican pottery or tile.

I found this almost immediately.

a

And I loved it.

BUT it was $45 a yard. Unsure if 1 yard would cover 3 cushions, I hemmed and hawed. I thought it over. I lamented.

Ultimately I decided that it was not in my budget.

And then went to the clearance racks, where I found a whole lot of garbage but then, buried and alone in the bottom of a pile, I found this

Ahhh!

and for only $6 a yard.

Perfect.

And even more perfect when I got to the cutting table and the employee told me there was an additional 50% off the clearance racks right now!

So I bought all that was left on the bolt, about 2 1/2 yards, for $7 and change. Yaaaaaay!

Then I brought it home and did this:

I do love this fabric, but it had to go :(

Goodbye beautiful green corduroy
I still love you green cushions!  You just don't work in my room anymore!

Let's get crackin'

Unscrew

And we're off!

Cut out the new stuff

Wrap it up!

Staple Gun!
I bought the staple gun at the fabric store.  It was about $20.

Put it back together.
A little boy is the perfect helper when reattaching the seats.


And just like that!  They're all done.
LOVES IT!

In the sunlight

Ahhh! Much better!

All told the project took me about 5 hours to complete.  Mostly because I removed the green fabric from the first chair I covered and that took FOREVER.  So I decided to just cover over it for the other two. 

I love the new cushions!  What do you think?

Wednesday, January 11, 2012

Bargainy

Look up there!  I've made up a word!  A word that means "sometimes you can make wonderful things for much cheaper than you can buy them!" 

I experimented in the BARGAINY creation of granola yesterday, after electing not to spend $3.50 for about 12 ounces of super plain granola.  Since I have a tree nut allergy it's difficult for me to find granola I can eat, anyway, and making my own seemed like a logical leap. 

So I purchased some ingredients, and decided I'd wing it.

I got:
1 large container of regular oats ($2.47)
Flake coconut ($1.72)
Wheat germ ($3.50)

and from the bulk bins:
Salted, roasted sunflower kernels (.84 lb for $1.60)
Soy nuts (.33 lb for $0.43)
Sesame seeds (.20 lb for $0.57)
Dried cranberries (.73 lb for $2.74)

And I already had on hand:
olive oil
brown sugar
maple syrup
honey

I'll calculate the actual cost of the granola a little later, since I didn't use all of each of the ingredients.

I did consult a few recipes before I jumped in, but I didn't follow any recipe to the letter.

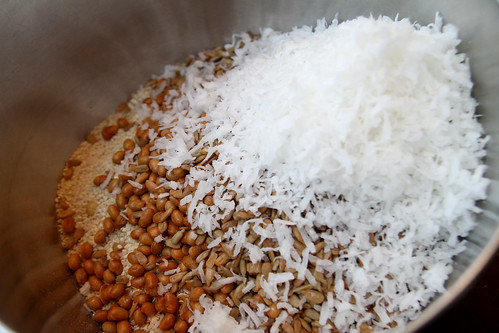
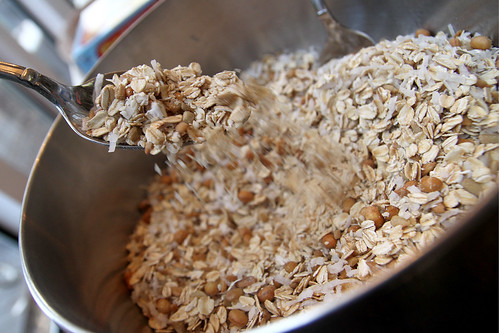
First, I mixed up the dry ingredients. In my case it was oats, sesame seeds, sunflower seeds, soy nuts, coconut, and wheat germ.

What I deduced here is that ingredients, and even proportions here don't really matter. Add things you think you'd like to eat. Make it sweeter or less sweet depending on your preference. It's fun! :)

All the dry ingredients

Nice and Mixy!

Mix well

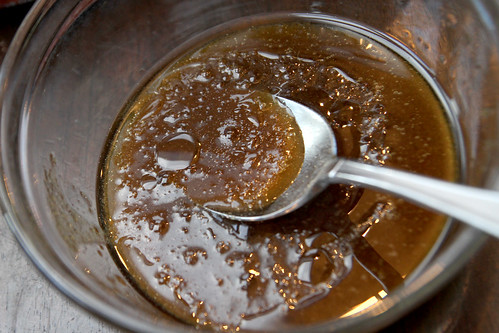
Now for the wet part. Or as my mom would call it "something to stick it together". Every meal needs to stick together. Didn't you know this? Well my mom knows it and utilizes this method!

In the sticky department I've used about 1/4-ish cup of olive oil, 1/2-ish cup of brown sugar and 1/4-ish cup of real maple syrup. I threw about a 1/2 teaspoon of salt in this step, too.

Again, I don't think that what you use here matters that much. You can skip the syrup if you don't have it or don't like it. You could use any kind of oil and any kind of sugar. Or no sugar if you're a lumberjack or something.

I mixed those up in a little bowl, kind of like I would do for a salad dressing.

The something-to-stick-it-together

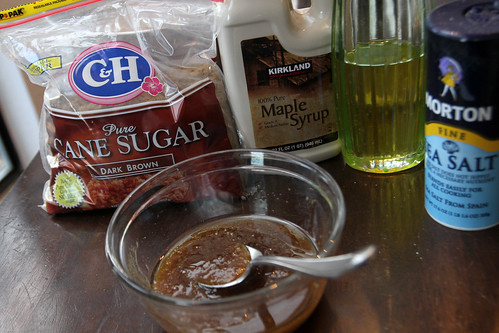
See? Looks like dressing, right? Well, sort of.

Kind of reminded me of a vinaigrette

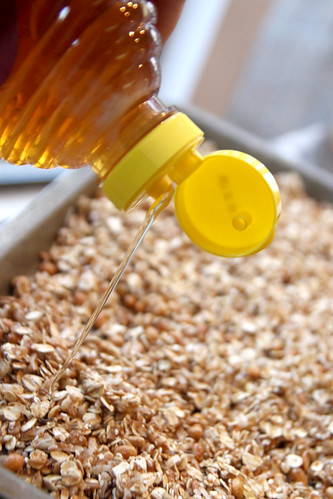
Then, I drizzled the wet mixture over the dry mixture, thusly:

Coat dry mixture with sugar/butter/oil/syrup mixture

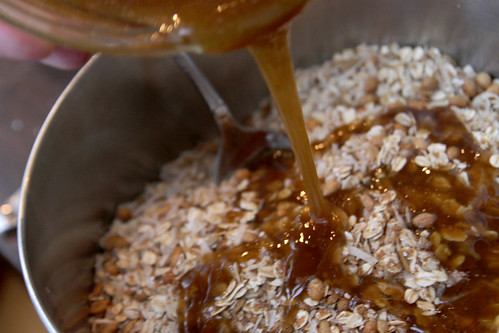
It covered the top pretty much completely.

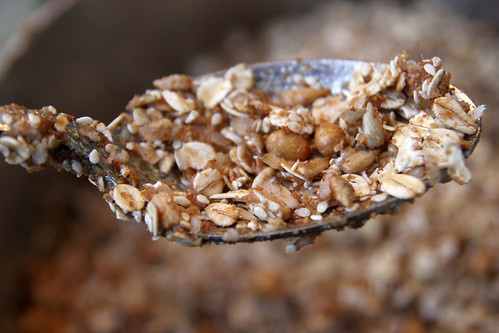
Then just a little stirring and I came out with a concoction that kind of stuck to my spoon. The spoon sticking told me that my wet-to-dry ratio was working. If it seems to dry you can always drizzle a little more of something on there to get it where you want it.

When it's somewhat sticky-togethery, you'll know it's ready

Then I spread it out on a cookie sheet, or in my case, two cookie sheets. I made a mistake here, that I wouldn't fully understand until I was finished with the whole batch. See if you can figure it out before I tell you.

Spread on a cookie sheet

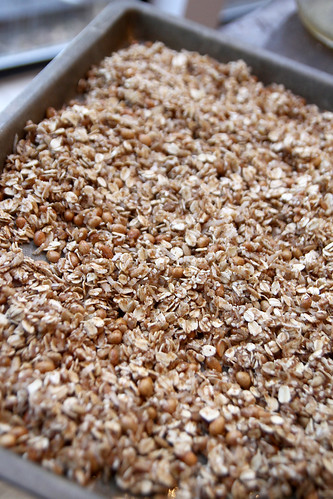
A little drizzle over the top of each pan with some honey

Honey drizzle

and then into the oven the pans went. The temp was set to 250 degrees.

Into the oven at 250 for 1 hour and 15 minutes

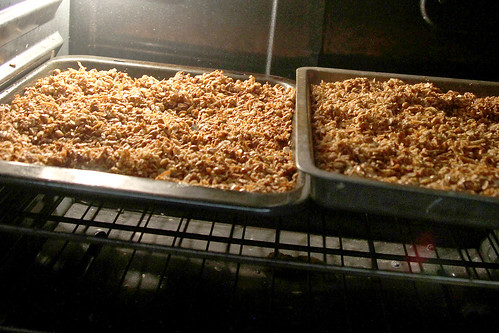
(The two pans, that are not the same, and also are different)

Stir every 15 minutes

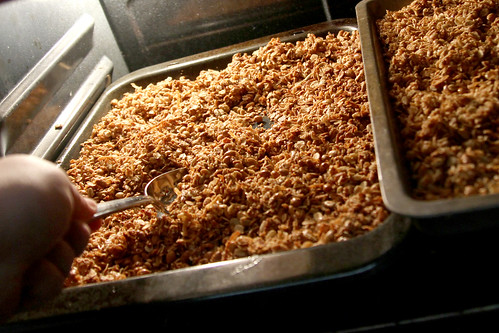
I set the timer for 15 minutes, every 15 minutes. When the timer beeped I stirred the granola and reset the timer. It was like a little dance I did.

Alton Brown's granola recipe recommended 1 hour and 15 minutes of baking, stirring every 15 minutes, so that's what I did.

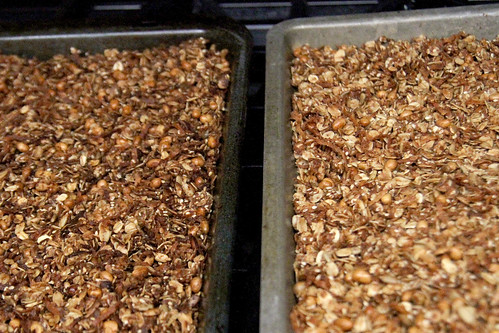
When it was about ready, I took the two pans out and saw something I didn't see when they were in the funny colored oven light.

Looks like the darker pan I used cooked the granola a weence faster. One pan was a bit . . . shall we say . . . caramelized.

One of these things is not like the other

When we burn things in this family it takes a quorum of family members to decide what to do. So, as if there was nothing else to be done, the four of us stood around the stove top nibbling semi-burnt granola. We mostly agreed it still tasted ok. But we had to taste it some more.

And yeah, we definitely agreed, it's edible.

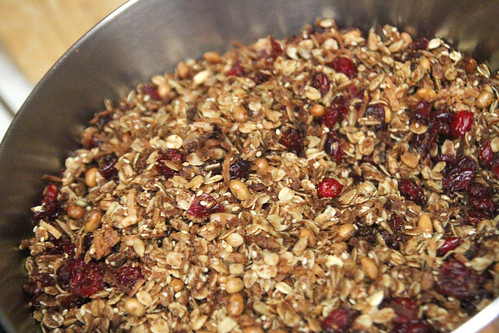
So I went ahead and mixed the two pans together, along with the dried cranberries I bought, and ta da! We have a finished product!

Mixed together with dried cranberries added

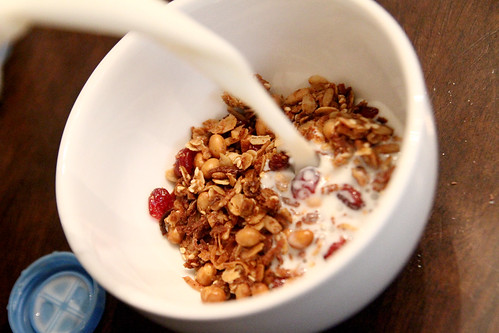
And just to be completely sure, my son and I decided we'd make a bowl with some milk, for a REAL taste test. It is quite tasty. Not too sweet, and the combination of soy nuts, sesame seeds and sunflower seeds almost tastes peanut buttery. Kind of yummy. Actually it might be really tasty with a few chocolate chips thrown in.

Taste Test

Ok, math time.
The tiny 12 ounce bag of granola I was going to purchase was $3.50. If you divide that out you get a per ounce price of about 29 cents.

So, was the home made cheaper?

Calculating approximate amounts of the ingredients I used, as well as approximate costs for the ingredients I already had on hand (about 1/4 of the oatmeal, all of the cranberries, just a couple tablespoons of wheat germ, and so on)

I've come up with a total price of $8.57 for my granola.

When it was all finished and bagged up, the bag weighed in at about 3 pounds.

My fancy math machine (calculator) tells me that's about 18 cents per ounce of granola.

But we should discuss something else.

The granola I was going to buy was the most basic of basic granolas. Simple oats and raisins, no nuts or added tasty bits at all. My granola is full of hearty goodness.


I most certainly could have made this cheaper as well, by narrowing the ingredients down a bit.  I could have chosen coconut OR cranberries, for example.

And since I had such success making granola, I spent the whole day today canning my own beans. Sounds totally exciting, right?