
I'm working on the titles.
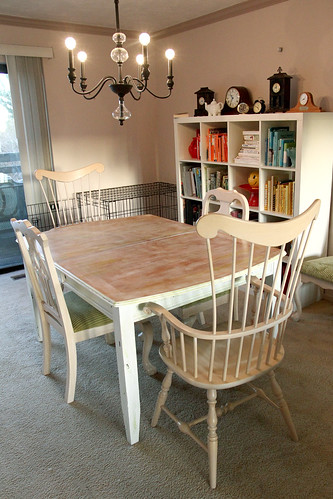
Remember how I sanded the table? And then I did a lot of other stuff to it?
Well, after that, my dad (the boss of all wood involved projects) offered to spray the finish on my table for me.
Who am I to turn down an offer like that?
I want to stress, though, that I certainly would have simply finished it on my own, if he hadn't offered. While the fact that the finish was, in the end, sprayed on the table did make the process much easier and faster, but it certainly would have been doable without the help.
After assisting with loading the table into my dad's truck, riding along as he drove it to his house, and assisting in the unloading of the table, my work was pretty straightforward and simple from there on out.
Watch my dad do one final sanding with his sander that works significantly faster and better than mine.
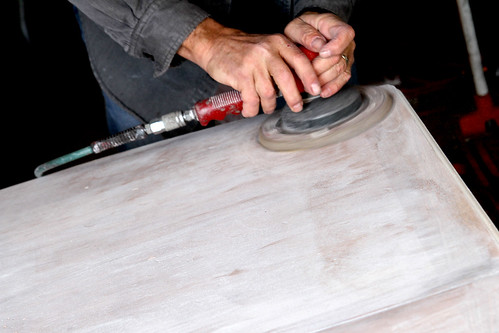
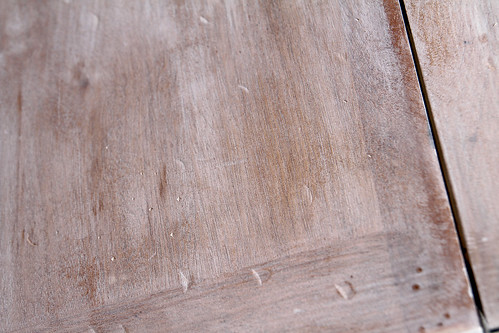
I had intended to do this myself, but it literally took him four minutes to do one final finish sanding. I love how the wood shows through just a bit. Perfect!
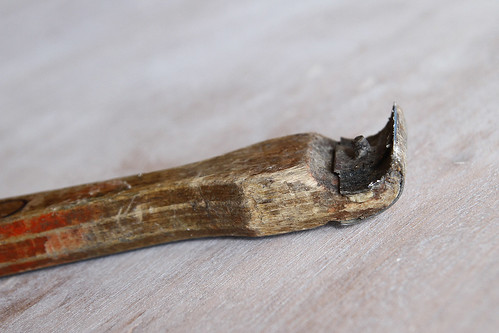
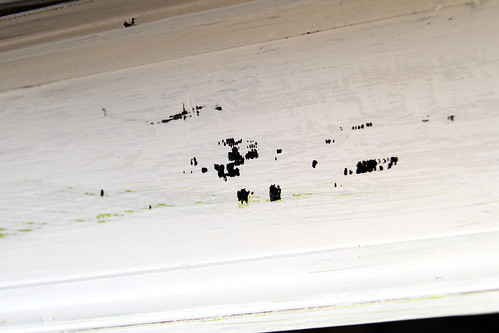
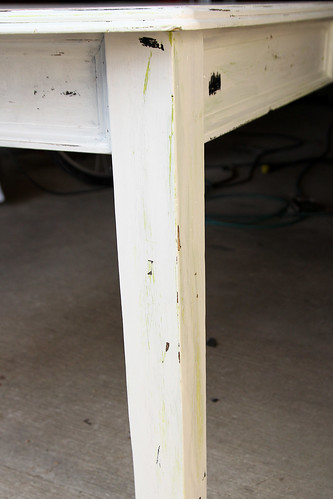
While he did wood-guy things in the garage I used his pretty awesome wood-guy's scraper to distress the legs and edges of the table top. I ended up liking just the scraper and never did end up doing any distressing with the sander.
After the legs, table edges and base were distressed
the two of us got a little creative!
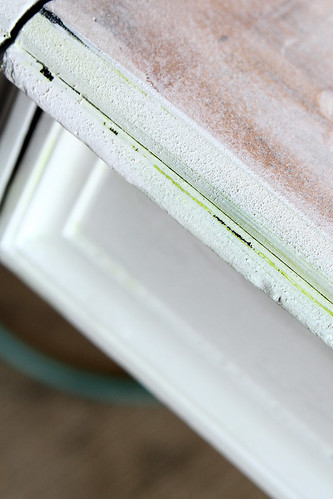
Dad mixed some chartreuse-ish paint tints with paint thinner. (He says paint in the color you like and whatever the packaging says to use to thin it would work the same. The tints were just used because he already had them on hand.) Then, just dabbing the edge of a rag in the tint, and blotting it thoroughly, he ever-so-gently wiped the color on to the table top in places. He also wiped a little of it around the white rim.

I ended up absolutely loving this effect because it makes the green on the legs really sing. You'd have to see it in person, but I feel like the green in the distressing is so much more noticible because of the tint on the table top.
After a little more drying time, cleaning all the dust away, and putting the table up on cinder blocks in the driveway he sprayed the first of three coats of finish on the table.
We used Minwax brand finish in "natural", applied with an automotive spray gun. Of course this could have been done with a brush. But if you know someone who has the ability to spray something for you, I highly recommend it. It was a snap to finish. Each coat took about 5 minutes to apply. Additional coats can be applied once the finish is mostly dry, unlike staining with a brush, where you have to wait until each coat is totally dry before reapplying.
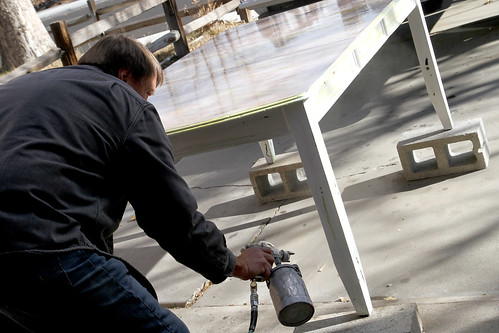
We let it dry about 1-2 hours after the first coat, and 20 minutes between the other two.
And that was it.
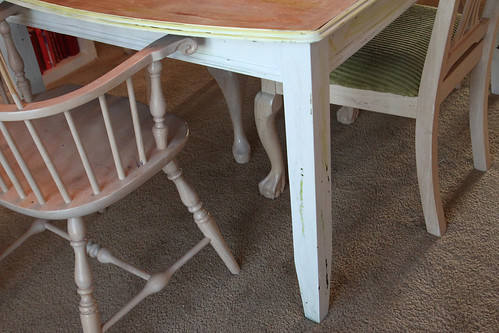
It was left to dry overnight, in the heated garage. The next day he brought it back to me, looking all pretty and stuff.

And that's it . . . for now.
My confession is that I have already done a little something else to this room, because after the table was redone I felt a little too shabby chic and not enough ecclectic chic.
I'll share that project soon.
No comments:
Post a Comment