Friday, December 30, 2011

File this under: I AM NOT A SHORT ORDER COOK

It was a wise woman who once said, "Oh no, little child! YOU WILL EAT WHAT I MAKE OR YOU WILL NOT EAT AT ALL!"

This wise woman held her ground.  She taught her children to eat everything on their plates, and they never complained, and they never cried, and they never, ever, ever had even a little twinkle of complaint about anything.  It was said, throughout the land, that the wise woman's children were THE BEST children of all.  OF. ALL.

Or wait . . .

Maybe it wasn't quite like that.

This is the story of how I found myself cooking two separate dinners.

Let's go back to July of this year.  My darling 9 year old girl, who loves animals and wants to be a veterinarian, was reading her favorite book.  (HIGHLY RECOMMEND!) When, almost as if she'd had a sudden epiphany, said to me, "Mom, I was just thinking.  If I want to be a veterinarian, I probably shouldn't eat animals.  Vets don't hurt animals, they help them."

Well . . . um . . . but, you see . . .

I had to think for a second.  I reminded her that I buy almost all of our meat organic and talked to her about how organic animals are raised in a more humane way.  I told her that God tells us in the bible that animals were given to us for food.  I told her that I am always careful to choose foods that are farmed in a way that causes the least amount of environmental burden, as well as a better life for the animals.  And then I blabbed some more . . .

Then she stopped me, "Mom, it's not that I think eating meat is wrong, it's that I think that I just don't want to do it."

Faced with a sudden dilemma of choosing between explaining myself unnecessarily further (with the overtly obvious intention to push my child toward my way of thinking) and embracing my daughter's uniqueness I just said, "That's fine if you don't want to eat meat, but you still have to eat healthy."

So over the next couple of days, as she dabbled in vegetarianism, we talked about protein and what foods contain it and how much of it she needs.  And I set down a few ground rules.

1. If you're going to be a vegetarian, you cannot also be a picky eater.  This means you must eat beans, brown rice, Greek yogurt, quinoa and lots of veggies.  You won't subsist on a diet of nothing but cheese pizza and veggie burgers. (as fun as that sounds!)

2. If you're going to be a vegetarian you cannot pout and complain when you go out and there's nothing vegetarian for you to eat.  You have to be flexible.  You might attend a party that provides very few vegetarian options.  When this happens, you can not stomp around and behave as if you are entitled to special food.  Carrot sticks are your friend.  If you're not sure what will be available, you can always pack a sandwich.  (If you have to resort to your packed sandwich, eat it discreetly. Don't stand in front of everyone and bark about how you don't eat meat.)

3. If I am going to be buying specialty foods for you, you're going to eat them.  Greek yogurts cost nearly $1 a piece.  I don't want to be throwing these things away because you took two bites and decided you didn't like it. 

4. The specialty foods I buy are not for your exclusive use.  They are for our family.  You don't decide who eats them or when they are eaten.  I remember a church camp out once with a young boy who was diabetic and would have an incredibly awful tantrum any time any person drank a diet soda.  It's not cute when someone acts like a diva, no matter the reason.

After a few days of dabbling, she made the call.  She wanted to be a vegetarian for sure. 

And here I am 5 months later, still cooking a vegetarian dinner - or a dinner and it's vegetarian cousin - every single night.  All in all, it has been a surprisingly simple adventure.  It's saved us some money (meat is pricy!) and it's probably pushed us toward a few healthier choices.  The lovely lady is very confirmed in her decision.  She hasn't wavered, in the slightest.  She didn't even cheat for salami and cream cheese, or bacon, or bbq'd steaks.

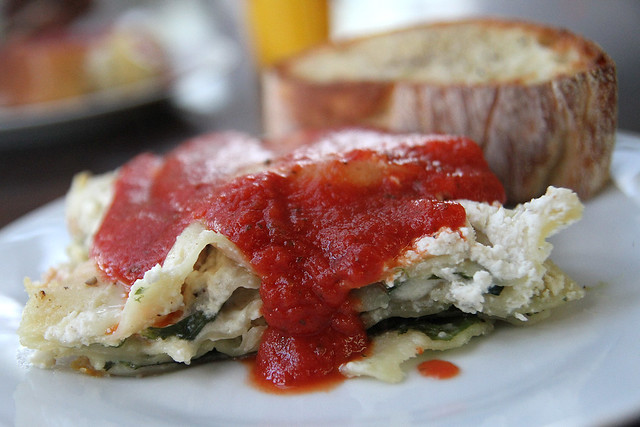
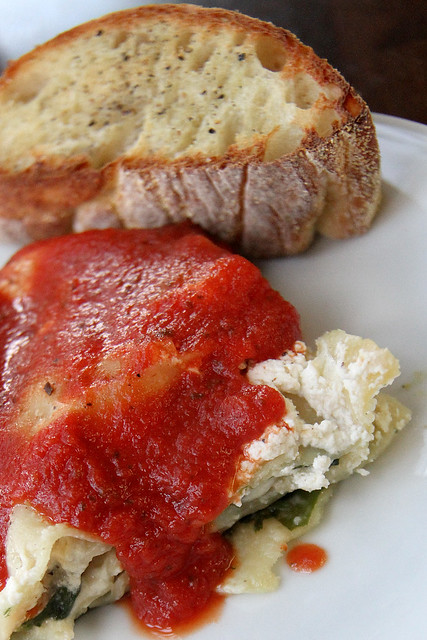
Here's a meal that became a favorite of our family over the past few months.

If you want to make it you'll need:

A package of chicken drumsticks (organic)
Salt, Pepper, Garlic, Cumin, Chili Powder, Paprika, White Pepper and Chipotle Chili Powder
Naan (I got mine at Trader Joes)
Falafel (ours came frozen, also from Trader Joes, you can make it from a box mix or from scratch, if you're ambitious)
Your favorite lettuce
Shelled sunflower seeds
balsamic vinegar
olive oil

and a BBQ grill

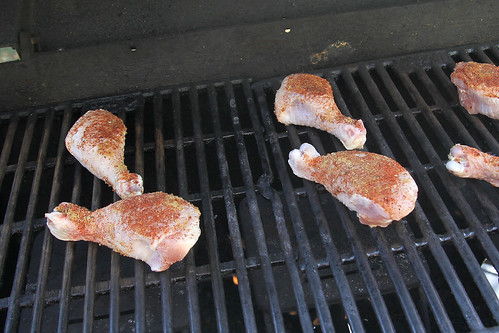
I started with a package of chicken drumsticks. About two per meat-eater is perfect for our family.
1

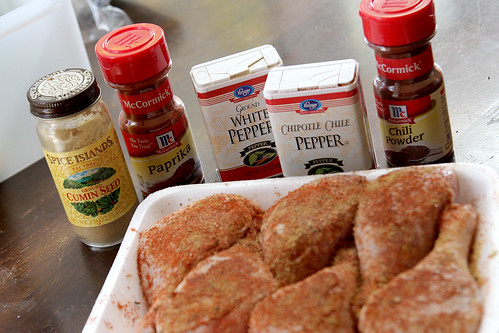
I sprinkle one side of the meat with salt, pepper, garlic and each of these spices. You can adjust the proportions of spicy spices, to not-spicy spices to make it how you like it.

I like to do one side only, so that it doesn't get too spicy.

Now, throw the chicken on a hot grill. I do spice side up, first. My theory was that the spices would soak into the meat while the other side cooks.
2

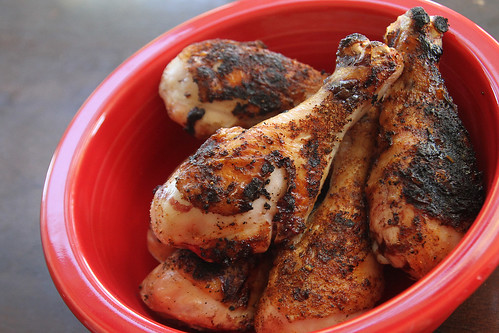
Turn it over when a little bit of blood starts to run out. They will take longer than you think they should, if you're not used to cooking chicken on the bone, on the grill. These probably took about a half hour, total. (allrecipes.com says 10-15 minutes per side, too) (prep the other food while it cooks!)

3

When the chicken was nearly done, I moved it off the grill

4

and put the naan on the hot grill.  Naan is from heaven.

5

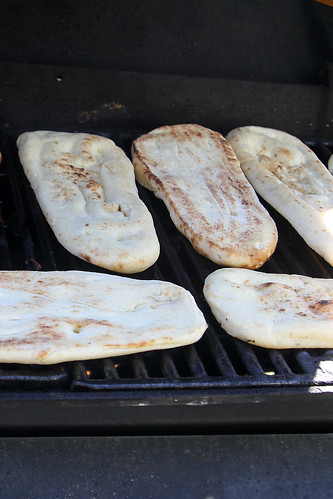
You'll know it is finished when it has amazingly delicious grill marks:
6
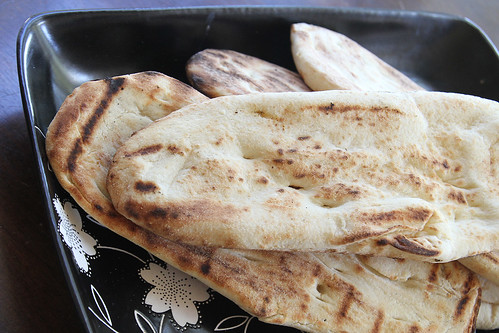
Keep it warm by placing it in the oven while you finish everything else up.  If you time it correctly, it should come off right when you are ready to sit and eat.
The brown rice I am serving here is from Trader Joe's and is the easiest thing ever. It comes frozen, and just needs to be microwaved for 3 minutes. Of course, you can make your own.

The falafel is similar. Trader Joes, Microwave. You know the drill. 

The salad is the best trick of all. No one will believe how simple it was!

Wash, dry and tear your lettuce into bite sized pieces.  Put the lettuce in a large salad bowl.  Drizzle with olive oil and toss.  Drizzle with balsamic vinegar and toss again.  Now sprinkle some granulated garlic, a little pepper and a healthy handful of the sunflower seeds.  And toss again.

It's good.  The sunflower seed crunch is magic.

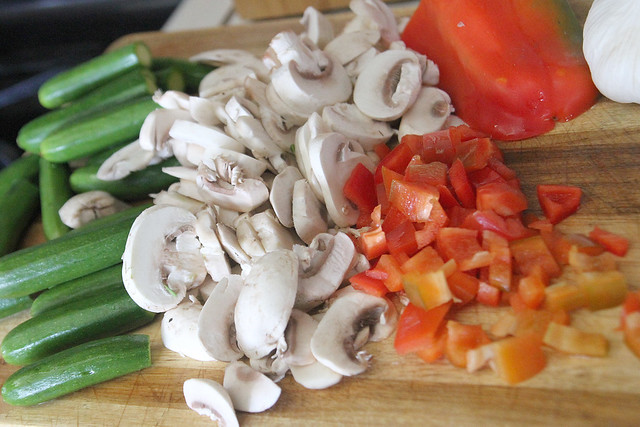
This salad is extra good with cucumber, tomato and avocado, too.

So there it is.

twodinners

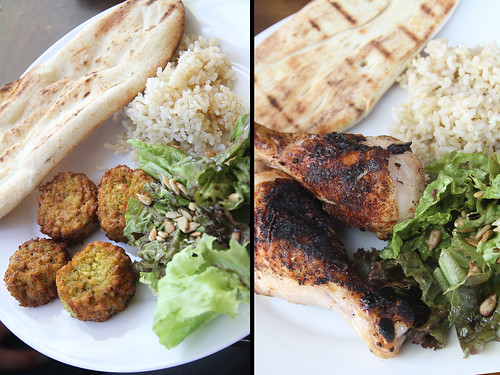
Two different, but the same plates.

Monday, December 26, 2011

Pie Redux + Random things I totally love

You may recall that wonderful looking Caramel Apple Pear Bourbon Pie I made the other night. I say wonderful looking, because it had yet to be tasted, when last I posted. 

Now it is all gone - and I wish that it wasn't.  It was wonderful and delicious.  And that's what you need to know. 

I had some concerns that the pie would be too wet and that maybe the crust would be soggy, but it wasn't.  The excess liquid thickened perfectly.  I highly recommend trying something like this.  Take my idea and play with it or make up your own pie recipe.  Take a restaurant dessert you love and turn it into something you can make at home.  It will most likely be delicious!  Worst case?  You'll learn a little something about cooking!

If you're in to wonderful food
Another amazing dessert we experienced this Christmas came courtesy of my sister who *heart*s Pinterest as much as the rest of us.  She made incredibly wonderful, totally delicious, and mind bogglingly simple Dulce de Leche sauce, ALL BY HERSELF, in the crock pot.  It was exciting to be present when she opened it up and we all saw that a couple cans of sweetened condensed milk, and a crock pot can come together to make magic.  Delicious, wonderful magic.  You can find the recipe HERE, if you're inclined to try it.

Break Time
Now that Christmas is over, the kids and I have a goal.  For our Christmas break we're going to be reading The Invention of Hugo Cabret together. When my kids discovered this book in our very most favorite independent book store EVER, Sundance Books, they brought it to me immediately.  I had seen Martin Scorsese on The Daily Show a couple days before that and he'd commented about how wonderful the book was, and how his kids' love for it led him to direct the movie Hugo.  So I was excited to read the book, right off the bat.

Then I opened it.

And then I cried.

I wish I was exaggerating, but I'm not.  My eyes totally welled up at the extreme level of loveliness that oozes from this book.  You NEED it.  You need it right now.

As soon as we're all done reading it, we'll be going to see Hugo in the theaters!  Hopefully this whole plan will come together nicely by the end of this week.  Can not wait!

Speaking of movie trailers
I have a thing for documentaries.  I watch a lot of them and I can't stop watching them and I can't stop talking about them.  The other day I caught up on new doc trailers.  I am now officially excited to see this movie (kind of seems to be akin to Winebago Man) and the feel-warm-and-squishy-all-over trailer makes me excited to see this one, too.  Both have already been released, but since I don't live in a big city, I have to wait until Netflix has them for me to see.

Some day I'll open an art house cinema and you can all come to my place to watch documentaries every Friday night.  I'll make tamales and we'll have Perrier and pretend to be fancy. 

If you want to watch a documentary
I recently watched Senna, which was wonderful.  It is a nearly narration-free, super real, look into the life of Formula One driver Ayrton Senna.  It is available on Netflix live streaming.

The kids and I also watched the 1996 film Microcosmos.  The entire film is shot in extreme close-up, with tiny cameras and tons of time-lapse footage of bugs of all kinds, going about their daily business.  It has very little narration and the kids and I loved it.  (Fair warning, you will see a pair of slugs and a pair of ladybugs getting a little personal at some point in this film.)

Also
The kids put their Grandma money together to purchase a Kinect (we already had the xbox) and we spent our Christmas Eve dancing up a storm.  Just Dance is quite possibly, the most fun game ever.

I hope you all had an amazing Christmas!

Saturday, December 24, 2011

I have made pie

First, I found some cough drops which offered me some much needed relief. 

Then I made quick and easy bean burritos for dinner.


Then, I set out to make an incredible pie.

Oh, it definitely went down.

Fruity
4 apples and 4 pears. I had them on hand. The fruit decided what kind of pie I should make.

I let fruit make lots of decisions for me.

One down, 7 million to go

I peeled them one at a time, and let them rest in a bowl of water, with a quarter of a lemon squeezed into the water.

One by one, I peeled them.

Peeled

Then, I cored them and sliced them, thinly. Just as typical pie recipes instructed me to do.

Cored

Slices

and back in the water they go.

Sliced, resting in water with lemon

After they were all sliced I put them in a colander over the sink and let them sit and drip until I was ready to use them again.

Then things got a little crazy.

Candy and Liquor - best pie ingredients ever

Well, not too crazy, don't get excited or anything.

I unwrapped about 18 caramels and melted them in a sauce pan with about a tablespoon of milk. This step is undocumented because I was distracted by the molten piece of caramel that jumped out of the pan and landed on my right index finger. That didn't feel nice. But I had to get my weekly burn out of the way, so, there's that.

Once the caramel was melted, I removed it from the heat and stirred in about a tablespoon of the whiskey.

I put the now somewhat dry apples into a large mixing bowl and added about 2-3 tablespoons of flour, 2 teaspoons of cinnamon, 1/2 cup-ish of sugar, a 1/2 teaspoon of salt and the caramel mixture. I tossed it all together using two large spoons, and let it sit for a second while I prepared the pie crust.

Now, I'll be honest with you. I did cheat here. I used store bought crust. Which is in no way shape or form anywhere close to home made, but I'm sick. Cut me some slack.

The bottom crust goes into the pie tin, first (captain obvious, to the rescue!)

Bottom crust

and the top crust I cut into 1" wide strips

strips

Using a fork, poke some holes in the bottom of the bottom crust, then add your caramel-y, apple-y, delicious-y mixture. Mine was a bit wet, I left about a tablespoon or so of liquid behind in the bowl, but the majority of it went into the pie.

Now, take the 1" wide strips and select about four of them to go across the pie in one direction, like this
Pinch here, lay flat
Pinch them against the bottom crust to make them stay in place.

Then, pinch the rest of the strips against the other side of the crust, like this
First lattice

Then, using your skills in the folding and unfolding of dough, you're going to make a lattice design.

Start on one edge and work your way across the pie.  Fold the strip farthest to the edge back and lay a perpendicular strip across, underneath.  Then lay the folded back strip flat again, and lay a perpendicular strip over it.  And on and on until the whole pie is latticed.  It's easy to mess up, but also not hard to do.  I actually kind of messed mine up when I was photographing it.  But it's easily unfolded and refolded until you get it right.

fold and unfold

Pinch, pinch
Pinch the dough strip on the far side when you're all done folding and unfolding that strip.

When it's all done, trim the excess dough off the edges and press it all together with the tines of a fork.

Ready for bakey

TA DA!

You can bake the little pastry scraps, for a tasty snack, too! I tossed mine in a little cinnamon and sugar and put them on a cookie sheet right in the oven with the pie.  They take about 10 minutes or so to bake and they're yummy.  Call the kids quickly, before you eat all of them yourself.

Just like momma used to make

Now, bake at 400 degrees for about 45-ish minutes. When the crust was reasonably golden brown I gently inserted a fork between the lattice and tested the fruit for done-ness. It was done.  And out it came!

I have made pie

It sure does LOOK tasty, but I won't know for sure until tomorrow when the family joins us for Christmas Eve dinner.  Mine is happily resting in the fridge now, I'll reheat it before dessert time, tomorrow!  Serve with ice cream!

Friday, December 23, 2011

SICK SICK SICK

And not in a good way. 

I've been coughing (to a degree of severity that I'd prefer not to discuss right now, but if you're female, over the age of 25 and/or have given birth to a child at some point, you probably know exactly what I'm talking about) all day, every day, for at least week.  It's a terrible, awful problem and I wish it would go away.  I wish I didn't have to do things and be sick.  I wish that I could hide or disappear for a couple days.  I wish I KNEW HOW TO MAKE IT GO AWAY.

But I don't.  So I'll rest and think about what it feels like to not be sick.  But not too much, because late at night, when the coughing won't stop, daydreaming about feeling better only makes you feel worse.  I know from experience.

Instead of doing anything else, I'm going to sit at the computer and make a Company is Coming on Christmas Eve and I'd Better Start Baking, plan.  I'll draw a graph and everything.  Well, maybe I won't draw a graph. 

My wonderful husband ran to the store on my behalf last night, and procured the supplies I need to make two pies.  I've got 4 apples and 4 pears on hand and my plan is to create a pie of my own design.  I'm thinking Caramel Apple Pear Pie.  Good idea? Yes, yes I think so. 

I've googled and have referenced existing recipes.  I could make my own caramel, but I have a bag of caramel candies on hand, so I think I'll use those.  I'll document my journey.  I'm not making any official promises, but I think this might be kind of awesome.

Friday, December 16, 2011

DIY Quickie

This is a story of how an 8-year-old-child's charming white toy box, turned into a very-grown-up-9-yea-old's ecclectic, bohemian toy box.

First of all we have to talk about HGTV and how it pollutes the mind with IDEAS.  Ideas that just don't seem to go away.  Especially not when a very-grown-up-9-year-old's head is the head full of them.

This particular idea, inspired by an episode of Home by Novogratz, went something like this: Cover something, ANYTHING, with duct tape.  PRONTO.  After saying "No, we cannot cover the coffee table in duct tape" 6 to 8 times daily for several weeks, I gave the go ahead. We could cover an item of furniture in her room with duct tape.

The chosen item was this toy chest:

BEFORE

Our first task was to remove the charming, but pesky wood trim around the lid. I suppose the purpose of the wood trim was to make the toy chest look a little bit like a bench. The problem with the trim was that when one opened the chest's lid, the trim dug deep into the wall behind the chest. The wood was loose and the wall behind the chest was stripped all the way down to bare, crumbling drywall.  To keep this problem from expanding further, the toy chest had to be slid about 5 inches away from the wall. The perfect distance for all your falling-over-in-the-dark needs.

In short - the trim HAD TO GO:

No more trim

Next, we selected the tape to be used:

Duct Tape

The choice belonged to the young lady, and I think she chose quite well!  We purchased the tape at a craft store, but I have seen it just about everywhere.

We decided we would alternate stripes of the existing white wood, and alternating patterns of tape. Working together we held long pieces of tape taught, and lowered them down onto the chest carefully, smoothing from the middle to the edges.  (After the fact I thought a basket weave pattern might have been really neat - but, a day late and a dollar short . . .)

Lay them straight

The tape's edges on the back of the chest don't show, and don't need to be perfectly straight. Little Miss trimmed them all by herself:

Symmetrical

The edges on the front and sides, though, needed to be cut a little more precisely. We elected to use a pocket knife to cut the tape.  A box cutter would have worked well, too.

Trim straight!

Finally, we decided we would put an initial on the front of the chest. I made the initial carefully, while the edges of the tape were lightly adhered to the edge of my dining room table. I just trimmed everything up neatly and stuck the letter A right in the middle.

All Finished!

Ta Da!

All done.

The three rolls of duct tape cost us about $12, but there was plenty left for other projects, like these adorable flower pencils!

Monday, December 12, 2011

Christmas Christmas Time

Every year I seem to be on the hunt for something I can make A LOT of for cheap, so that I have simple gifts on hands for aunties and Grandmas and wonderful friends. Last year I made a million homemade bath bombs (which is wicked fun and I highly recommend!). Of course goodies are always an option and there's the old home made cocoa mix or bean soup in a jar ideas, too.
But this year, thanks to everyone's new favorite website pinterest I had a bazillion ideas. I ultimately settled on something a little more practical than Christmas normally calls for. Laundry Soap.

Yes, it's true.  I made them laundry soap. 

I found the recipe here, via pinterest.
I personally think it's just lovely:

Home made laundry soap

If you'd like to make some of your own, here's how you do it:

You'll need
1 box of Borax (4lb 12oz)
1 box of Arm and Hammer Super Washing Soda (550z) (Google told me that washing soda is baking soda that has been heated to make it more alkaline)
1 large box of Arm and Hammer baking soda (4lb)
3 bars of Fels-Naptha soap
2 containers of oxyclean (optional)

All of these ingredients are merchandised together in the laundry aisle of my local Wal Mart.  I haven't checked other stores but my guess is that you can get them anywhere. 

The prep on this is really simple.  Just grate the soap on a cheese grater.  I found that the larger holes on my grater worked best.  Then, just bring all the ingredients together in a kitchen sized garbage bag, inside of a garbage can or bucket or hamper.  Mix it together nicely with your hands, breaking up any clumps as you go.  Be careful not to accidentally squeeze a handful of laundry soap gratings like I did, they'll clump up tightly and need to be broken up again.  And that's it!  You have laundry soap. 

During my research about this soap I have discovered MANY other homemade laundry soap recipes that use essentially the same ingredients.  Some even use Ivory soap.  One commenter on a soap recipe said that she uses mini hotel soaps that her husband brings back from his business travel.  Not a bad idea if you're feeling super broke.

You only need to use 1 Tablespoon per load.  I've been using this soap for about 2 weeks now (without the oxyclean) and one tablespoon seems to work perfectly.  Other recipes I've seen online call for 2 or 3 tablespoons, but as far as I can see that's not at all necessary.

7 jars this size cost me about $14 to make (not including the jars themselves, which were $3 each, if you're curious).  The jars as shown hold approximately 60 loads worth of soap which works out to about 3-ish cents per load.  The recipe makes 420 loads of soap in total, for about 14 dollars.  I'd say that's like A LOT cheaper than any other soap out there.

Lastly I wanted to ad that I have been using it in an HE washing machine and it hasn't foamed up too much or caused me any problems consistent with non-HE detergent.  It melts just fine in cold water AND it is comparable to Free and Clear detergent in terms of gentleness on skin.  It hasn't bothered me at all.

In other crafty exploits:

I recently found this adorable mobile on Pinterest, which inspired me to create a cute DIY Christmas Card display. I made it completely out of supplies I had on hand, including 3-4 spools of ribbon, a little hot glue, a lamp shade frame and some tiny little clear clips (designed to clip string lights to a tree) that I purchased on clearance at Target at the end of summer.

See:
Something Crafty

Christmasy colors would have been more Christmasy, of course, but this way I can use the mobile year round.  Plus, I already had this ribbon on hand.

Now, hopefully someone will send me some Christmas cards! :)

Sunday, November 13, 2011

Making Life Rich

I've undertaken a project this week.  A week-long photographic documentation of our lives, that will be put together in scrapbook form, sometime in the near future.  I was inspired by the very inspiring Ali Edwards, and in this case I've taken her idea and tweaked it a bit.  My book will be 100% digital.  I find the process of creating a digital book to be more streamlined and simple for me.  It's also significantly less expensive than traditional scrapbooking.  Instead of bits of daily ephemera I've decided to supplement my good-camera photos with camera phone snaps, and photos that the kids took with our old point and shoot camera to give the finished product a more homey, eclectic feel.

So that's what I'm doing, and since it's my last day of full-time camera toting, and tomorrow I'll be icing my sore wrist (that thing is heavy!) I've been reminiscing.  Through this week I've had a chance to observe myself and learn about how I live now - and how I can live in the future.  This opportunity to learn came partially because full-time life documentation causes you to kick bad habits to the curb, stop sweating the small stuff, and just make life a little more interesting.  In this case it started because this week will be permanently remembered in a book - but it ended up shining a light on things for me. 

I realized: I CAN LIVE LIKE THIS ALL THE TIME!

We can go to the children's museum for an hour, before running harried afternoon errands. 
We can bake cookies after dinner and eat them while they're still warm. 
I can let the kids assemble their own pizzas, rather than doing it my way. 
We can rent a 99cent movie and have more fun together watching it than we would have had at the movie theater. 
We can have tea together and let the day's noise just fade into the background.
Monday - Favorite Mug

Thursday, November 3, 2011

How did things get so bad?

The kids are playing chess, we've just returned from an evening grocery run on a cold, but cozy night.  It's times like this that I am able to look at our life and feel grateful for what we have.   Blankets for miles, more board games than logic would typically permit, a sweet puppy dog, and lots of other great things.  It's times like this that I feel like ME.  The mom, wife and woman I'm meant to be. 

I started out as a rougher version of this woman, too.  When my husband and I were first married I was a lot like I am now, with more knee-jerk reactions and less patience.  I would have liked to have kept all the good and gotten rid of the bad, but instead I had to get far away from this place so that I could see how great it really is.  I had to walk to the edge of reason to understand my own longing for a simpler life.  I have often wondered how I went from a creative, crafty, memory-keeping, let's-do-something-fun kind of girl; to a busy, tired, burdened, unavailable woman.  I think that one benefit of sharing my story in a public format like this is the chance to figure that out.  WHAT HAPPENED TO ME?

My husband and I were married when we were ridiculously young, we were lovestruck teenagers with flowery-at-best ideas about what kind of life was in store for us.  When I became pregnant within mere days of our wedding, we suddenly had to get serious about life. 

In those first years, we tried to do it all.  We planned to stay in college, and keep working, and raise our kids (yes, we had another barely more than a year after the first one was born!)  It was too much for our young marriage, though.  After a few failed experiments in partial downsizing, my husband ultimately quit both school and his small children's ministry job at our church to focus solely on his budding career.  He had a full scholarship and endless possibilities, but ultimately we had to prioritize our marriage and young babies.  It wasn't what we planned, but even then we knew that there wasn't much to be done to save our plans. All this left me home alone, day in and day out, with two babies.  We even sold our second car to pay our co-pay for my daughter's birth. 

My plan to pitch in was simple, while staying home with the kids full-time I'd make money in any simple way I could.  I sold my handicrafts and many of our belongings on eBay.  I eventually got a part-time job near my husband's, scheduling my shifts so we'd need as little babysitting as possible, and carpooling to work.

Along the way I grew my childhood hobby of photography into a passion, and by 2004 I was prepared to leave my part-time job and start my own business.  It wasn't scary, because in my mind, it all seemed so simple.  And in the early days, it was.  I started out being elated at every phone call.  I felt such immense pride every time I was paid for my work.  I literally could not believe I was driving home with a check in my hand, with my name on it.  The sense of accomplishment I felt was overwhelming.

Over time my photographic work ballooned into something I never could have envisioned for myself.  I was working every single day, taking business related phone calls while we were on vacation, and working at the computer until 3am on a regular basis.  Of course, all this hard work did open up some amazing opportunities and for a time it all seemed like the sacrifices were justifying the rewards.

But I was struggling.  My patience with my husband, children and people in general, was fading.  I was sacrificing months-upon-months of my year to complete busyness, then when the slow season came again, I was depressed because my entire sense of self-worth was wrapped up in being busy all the time.  When I thought about taking a step back and giving myself a break, I talked myself out of it.  Instead I hired consultants who pushed me to work more, do more, be more.  And so I dove deeper.

Of course, throughout this time, much of the money I earned was spent on conveniences that made it possible for me to work constantly.  Things like restaurant meals, help with office tasks, and lots of I'm-working-too-hard-and-I-deserve-a-new-thing purchases, were bought before I even noticed how much there really was to spend.

It wasn't until I was sitting at the computer one night, considering how much more work I should take on, so I could afford a full-time nanny for my kids that

it hit me. 

WHAT AM I DOING TO OUR LIFE?

I was going to work MORE! So I could spend MORE money? So I could pay someone to care for my kids?

It didn't make sense.  It didn't make sense for me and for our family.  It hit me that I'll never be able to go anywhere, I'll never be able to relax, I'll never be able to enjoy my life, while I'm working this way. 

I applaud women who can work full-time or run their own businesses and still find time to love their life, but as it turned out, I just wasn't one of those people.  Maybe I could have made it work through more self-discipline and better strategies.  In fact, I'm sure I could have.  But when I laid out the pros and cons it just didn't make sense anymore.

Of course the time between realizing that things had gotten out of hand, and actually changing the way things were, wasn't so easy.  I had wrapped so much of my identity up in being a business owner, I had given my entire sense of personal worth over to it, and it wasn't (still isn't!) easy to give up.  I still have days where I start making a little mental plan on how to relaunch my business. 

But I truly feel that this is where God has me.  This is what my kids, my husband and I needed.  We needed a simple life.  Today, I am more grateful than I can even say for the change in our day-to-day routine, and I hope to open myself up to more opportunities to grow, each day. 

Friday, October 21, 2011

Step 2: Keep it Interesting

It's easy to talk about cooking dinner more often.  Not so much easy to do, especially when you're a restaurant addict like me.  My solution to the whole "I'm sick of cooking dinner" problem was to stop skimping on groceries.  I was raised by an amazingly thrifty mother who taught me the ins and outs of saving on groceries.  I know how to pay attention to prices and stock up.  I can cook cheap meals and make things last.   But I just can't keep on doing it, you know?  Halfway through week two and I'm signing my name to a $50 dinner out. 
Nowadays, I try to only buy good food (Diet pepsi and kraft mac and cheese, notwithstanding!)  Organic produce is a great place to start, and of course we already talked about my adoration for wonderful bread.  When we eat meat, it's usually chicken, usually that chicken is organic, and in drumstick form.  (Much cheaper than organic chicken breast!)  Having lovely ingredients in the house keeps me inspired, and keeps me feeling kind of restaurant-y.  There is a fine line between improving your grocery selections and pressuring yourself to have The World's Best Cart at Whole Foods.  I've done it to myself too many times, and I don't recommend it.  Use what you have.  Organic is better for our planet and health, but if you can't afford it or don't have access to it, just let it go, and use what you have. 

So with all this in mind, we have tonight's dinner.  Something that I've never made before, but it came out great and was liked by all!

Pasta Primavera!

You'll need:
1 - 1lb box of pasta, I used bowties
Fresh veggies, whatever kind you like.  I used
1 red pepper
1 package of mini zucchini (Trader Joe's) Probably equivalent to 2 regular sized zucchini
1 package mushrooms, sliced
1/2 an onion
1 scallion
Garlic
Salt
Pepper
Butter
Olive Oil
Chicken or Veggie stock
Milk (Cream if you're fancy)

Fill a large stock pot with water and put it over high heat to boil.  While it heats up, start prepping your veggies.  I diced my peppers into 1cm square-ish pieces, finely chopped the onion, sliced the mushrooms and cut the zucchini into 1" chunks (I'd do large slices on an angle with regular zucchini)

Lovely pasta primavera veggies

Start a large skillet with a pat of butter and a tablespoon of olive oil, over medium heat.  Once it is hot, throw in the onion and pepper.  I personally prefer my onions and peppers well cooked and without too much crunch left in them, if you like yours crunchier you might consider waiting until later to start your vegetables.  Sprinkle the whole party lightly with salt and black pepper, and add a little garlic, too. 

Keep an eye on your water and put the pasta in once it is rapidly boiling.  Stir, stir, stir.  Oh, and salt the water, too.  Lower the burner under the water to medium.

After the peppers and onions are soft and bubbling in some of their own juices, add the zucchini.  Zucchini looks yummiest when it has some caramelization on it's fleshy parts, so it's best to add it to the pan, give the pan a little shake, and then leave the darn thing alone for a couple minutes.  Too much stirring too early on will mess it up.  Watch the heat, though, you don't want to burn it.  Adjust the heat as needed.

Once the zucchini has a little color, add the mushrooms and scallions.  When I added the mushrooms I added another couple tablespoons of oil as well.  The pan will now be sufficiently crowded and your house will smell like amazing.

(Your noodles might be done.  Consider checking them now.  Your veggies can sit and simmer while you deal with the pasta.  If they aren't done, they probably will be soon.  Take thepasta off as soon as it's al dente.  The veggie part of this recipe is VERY forgiving and can sit on the stove for a minute just about any time during the cooking process.)

Once the mushrooms are looking mostly cooked, add your stock.  I used about 3/4 cup of homemade chicken stock.  I cannot recommend home made stock enough.  It will change your life.  But I also understand that there isn't always time or inclination to make it yourself, in which case, store bought works well, too. 
Game Changer

Once the stock is hot and bubbly, add about 3/4 cup of milk or cream.  I used 2% milk.  Cream would make the meal a lot richer and probably quite delicious.  Milk was perfectly adequate, though.  Stir the whole situation together and taste the sauce.  You'll probably need a little more salt, pepper and garlic now. 

Leave it to simmer for a few more minutes. 

While the veggies simmer and the noodles hang out, open a can of refrigerator biscuits.  (Old habits die hard, I'm sure there's some less processed alternative, but this is what I had on hand)

Spray 6 cups in a muffin tin with nonstick spray.
Rip or cut each dough round in half
Drop 2 dough halves in each cup
Drizzle (ever so lightly) each cup with a teensy bit of olive oil
Sprinkle each cup with fresh parmesan, garlic powder, salt and pepper
Place the rest of the dough pieces on top of the parmesan sprinkled dough - you might have an odd number in which case you can rip the remainders into quarters to make each dough/cheese conglomeration roughly even in size.

Bake at 350 for about 10 minutes (when you put your bread in, put the pasta and veggie mixture together and stir it all together.  Add a little parmesan and taste again.  You might want a little more salt and pepper)

I didn't time this, to be honest, so I recommend maybe ignoring my time suggestion and just watching these yourself.  When you smell them, check on them.  If they're still totally white on top, but kinda brown on bottom you can switch on your broiler and let the tops brown.  Once again, be careful with the broiler.  It goes from lovely browning tool to evil dream crusher in about a half second. 

Garlic Parmesan Biscuits

Now it's time to call the little ones to the table.  Make them pour the drinks and get the silverware! :)

Enjoy!

I need better food styling here, this makes it look like it wasn't very veggie heavy, but it was.  It was actually a perfect balance of veggies and noodles.
90/365 - Pasta Primavera

Monday, October 17, 2011

Step 1: Cooking Dinner

Long before I ever entertained the idea of giving up my business, the first step I took toward getting back to the mom and wife I wanted to be, was making a plan to cook dinner more often.

I have always loved to cook, but I REALLY love to eat out.  Probably more than I should even admit.  Even today, eating out is my largest vice, and I imagine it probably always will be. 

Because of his work schedule, my husband is only home at dinner time once or twice a week, so I had always figured cooking dinner didn't matter.  The kids and I would eat out, or grab something easy, and he could get himself food when he was hungry.  Our method kept us all happy for a time, until he finally told me that he wished I would cook dinner more often. 

I think I replied with something along the lines of, "What do you care?  You're never here at dinner time." 

You know, because I have a wonderful way with words. 

But he said he didn't care.  He'd warm it up when he got home, but he just loved the idea of coming home to a plate of food. 

And I guess I couldn't argue with that.  It made sense after all, that something I made with my hands,  would make my family feel a little bit more loved.  I guess the fringe benefit is that I feel loved, and needed, and useful, too. 

So, with all this in mind, how about a recipe?

I love to make up my own recipes, which I have learned is a bit much in the pressure department.  (My new job is to figure out how to stop putting so much pressure on myself!)  But, I finally have a good repertoire of recipes that are simple and healthy and delicious.

Cast your gaze upon the wonderfully delicious White Lasagna with marinara and AMAZING bread:

89/365 - White lasagne with red sauce and ridiculously good bread


The prep on this was really simple, and you can modify it to fit your needs.

Ingredients:
-1 box of oven-ready lasagna noodles (but it never hurts to have a second box on hand, just in case)
-1 15oz container ricotta
-Mozzarella - I use fresh wherever possible.  I usually buy one container of perlini (pearl-sized mozzarella balls) for ease of prep.  Of course, you can buy a bag of already grated mozzarella or grate your own, or slice the larger balls of fresh mozzarella, too.
-Parmesan cheese (any kind works, but I like fresh best!)
-Minced or granulated garlic, as well as salt and pepper.
 -Fresh spinach leaves washed and ready to go
-Marinara sauce - whatever kind you like - if you have homemade, you rock and I want you to teach me how to make it.
-2 cups of fresh White Sauce

Don't know how to make White Sauce?
My quick instructions are as follows:
Make a roux by melting a couple tablespoons of butter in a pan, and adding an equal amount of flour to the melted butter.  Let the roux bubble for a couple minutes, whisk it well so you don't have any lumps.  Pour a bit of milk in.  In this case I used about 2 cups.  Whisk some more.  Add whatever you'd like to add to make it taste yummy.  Your options include garlic, salt, pepper, Parmesan cheese (or any kind of cheese, for that matter).  Taste it and make sure it's good.  A truly delicious white sauce will be perfectly salted, and usually it takes a little more salt than you think it will.  Bland white sauce is, well, bland.  The roux you made at the beginning will thicken the sauce.  If it gets too thick, add a little more milk.  You will use this recipe a lot, so it's a good one to know and use and practice often.  Make this before you start the rest of your lasagna prep and set it aside so it is ready when you need it.

Instructions:
Spray a 9x12 baking dish with nonstick spray.  Start by placing one layer of the oven-ready lasagna noodles in the pan.  Pour about 1/3 of the white sauce over the noodles.  Next, put a layer of spinach leaves down.  Do this to your taste, some people like more, some like less.  I do two good-sized handfuls. This is your first layer.

The second layer will be a cheese layer.  Start with another layer of pasta, then add the ricotta.  It can be somewhat challenging to spread the ricotta evenly, but there are a few tricks.  I usually scoop out about 4-5 large dollops and drop them, evenly spaced, onto the pasta and then spread them out with a silicone spatula.  You can also add a couple tablespoons of milk (or marinara sauce when making traditional lasagna) to the ricotta and stir it in, to thin it and make it easier to spread.  Once the ricotta is spread, spread the mozzarella, then sprinkle Parmesan.  I usually sprinkle granulated, or fresh minced garlic on every other layer, pepper on every other layer and salt only once during prep.  Now is a good time to add some garlic and pepper.  This is your second layer.

The third layer will be a repeat of your first: pasta/white sauce/spinach
(make sure you save some white sauce for the top layer!)

The fourth later will be a repeat of the second: pasta/ricotta/mozzarella/Parmesan/
 (It is very important that you reserve some mozzarella and Parmesan for the top layer!)

On this particular day I had the perfect amount of ingredients to do a perfect four layer lasagna.  This does not always happen.  You can wing it when you start to realize your ingredient balance isn't working out, that's why it never hurts to have a second box of lasagna noodles on hand.

To finish your lasagna, add the final layer of pasta to the top of the pan, pour the remaining white sauce over the pasta and sprinkle the reserved mozzarella and Parmesan and lightly salt, pepper and garlic the top.

Cover the pan tightly with foil.  This is important because the trapped steam is what will ultimately cook your noodles.  Bake at 350 degrees f for about 40 minutes.  Check it by piercing with a fork or butter knife.  If it feels tender, I usually cut a small bite from the edge and taste it.  The cook time on this is pretty flexible and can vary based on the kind of pasta you use.  If it isn't tender when you check it, throw the foil back on and cook it for another 10 minutes, then check again.

When the pasta is tender remove the foil and allow the top to brown for 5-10 minutes.  It will get bubbly and golden and lovely. 


While your lasagna bakes, warm the marinara on the stove top and prep your AMAZING bread.

For the AMAZING bread, you'll need:
-1 loaf of delicious bread.  I like Pugliese or Ciabatta or really anything yummy looking in your grocery store's bakery department. 
-Olive oil
-Salt/pepper/garlic

Instructions:
Slice the bread about 1 1/2" thick.  This makes for a great crunchy-to-soft ratio.  Lay them out on a baking sheet and drizzle with olive oil.  Do this a little while in advance so the oil can soak in really good.  Sprinkle each slice with a tiny bit of salt, fresh black pepper and garlic (right now I'm using up a giant container of granulated garlic from Costco, but you can use fresh garlic, too!)  I make this same bread without garlic sometimes, too, which is also delicious.

Just let the bread sit there while your lasagna is baking, and when you take the lasagna out, change the oven to broil, and put the bread in.

Now: watch.  While you cut servings of lasagna, keep an eye on the bread.  Don't burn it or you will cry.  Believe me, I have cried over burnt bread more than once in my life.  It will probably take about 6 minutes or so to get nice and golden.  There is a VERY fine line between done and burnt.  Once it looks a little bit golden, start watching it like a hawk.

Here is another photo of my plate, with a better view of the aforementioned AMAZING bread:
Another photo, with a better view of the AMAZING bread you've heard so much about

Serve the lasagna with the marinara drizzled over the top of it.  Use meat sauce if you prefer a non-vegetarian dinner.  Have a piece of your AMAZING bread on the side.  Green salad is an excellent accompaniment to this meal, as well.

Enjoy!  Everyone in our family loved this meal.  One 9x12 pan fed the four of us for two meals.  My kids eat adult-sized portions now, so it might even feed your family for more than two meals.

The bread, of course, is gone in one meal.  No one can keep their fingers off of it.

Hello!

Hi there. My name is Emily, and I'd like to document the journey that our family has begun, toward a healthier, happier, simpler life. A life that is lovely and comfortable not because of the money we spend to make it that way, but because of the work we do, the time we take and the love we share.

For some years I worked feverishly, convinced that earning more money would somehow free me. Not because I was obsessed with money, but because I thought that a lot of money would free me to go the places I wanted and do the things I wanted. It would give my children experiences, and make my home beautiful, it would put delicious food on our plates and amazing photographs in our family albums. I thought that a great life just wasn't cheap, and I was prepared to work to earn the money to create that great life for our family.

I saw it as a healthy pursuit.

But as years passed and I found my tears pooling on my desk almost nightly, I finally realized that none of this was working. I was tired, I was overwhelmed and I was missing out on the joy that life can hold.

When my son turned 9 years old I flippantly said, "Well, I'm halfway done." And the sound of those words shocked me. I'M HALFWAY DONE. Halfway done raising my only son.

Those words pushed me toward a change. I knew that pushing myself to the farthest reaches of my own capabilities wasn't working. I knew that my idea of my priorities, and my actual priorities were not aligning. It's easy to say that family is number one, it's another thing to realize that your business (and clients, and meetings, and deliveries) are really number one.

Of course there are many more layers to our story, and I look forward to sharing all of them, as time passes. The journey that began as an idea, when my son turned 9, is now my daily pursuit. A daily pursuit that I work toward in positive directions sometimes, and I leap far away from, other times.

Today that 9 year old boy is an 11 year old young man, his sister is 9-going-on-10, and the great downsizing of our life has truly come to fruition. No really. It has. Folks, this past weekend, I started a COMPOST bin.

But welcome, to a little place where I hope to share the little things I've learned since I moved on from a life as an overworked mom, to a life where I have the time and energy to pursue simple abundances every day.