
First of all we have to talk about HGTV and how it pollutes the mind with IDEAS. Ideas that just don't seem to go away. Especially not when a very-grown-up-9-year-old's head is the head full of them.
This particular idea, inspired by an episode of Home by Novogratz, went something like this: Cover something, ANYTHING, with duct tape. PRONTO. After saying "No, we cannot cover the coffee table in duct tape" 6 to 8 times daily for several weeks, I gave the go ahead. We could cover an item of furniture in her room with duct tape.
The chosen item was this toy chest:
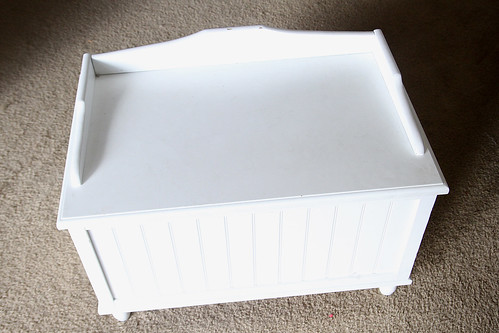
Our first task was to remove the charming, but pesky wood trim around the lid. I suppose the purpose of the wood trim was to make the toy chest look a little bit like a bench. The problem with the trim was that when one opened the chest's lid, the trim dug deep into the wall behind the chest. The wood was loose and the wall behind the chest was stripped all the way down to bare, crumbling drywall. To keep this problem from expanding further, the toy chest had to be slid about 5 inches away from the wall. The perfect distance for all your falling-over-in-the-dark needs.
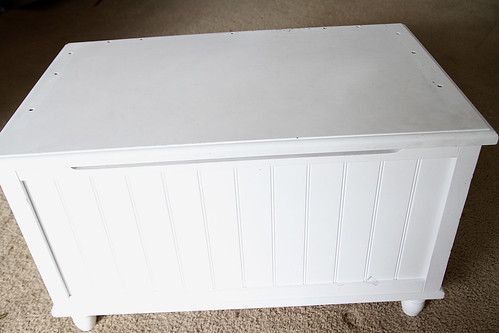
In short - the trim HAD TO GO:
Next, we selected the tape to be used:
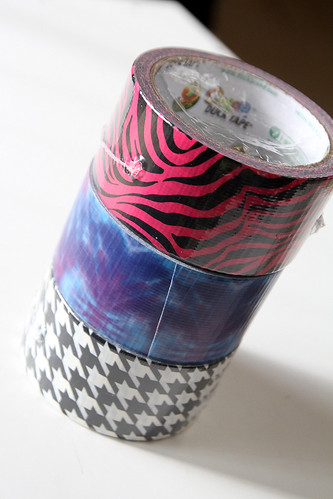
The choice belonged to the young lady, and I think she chose quite well! We purchased the tape at a craft store, but I have seen it just about everywhere.
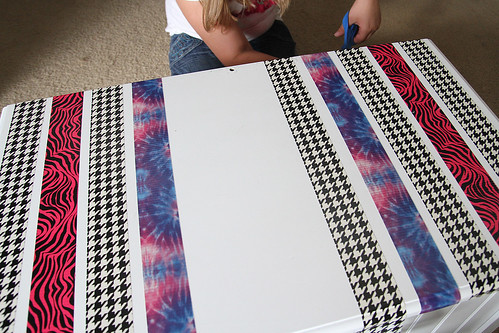
We decided we would alternate stripes of the existing white wood, and alternating patterns of tape. Working together we held long pieces of tape taught, and lowered them down onto the chest carefully, smoothing from the middle to the edges. (After the fact I thought a basket weave pattern might have been really neat - but, a day late and a dollar short . . .)
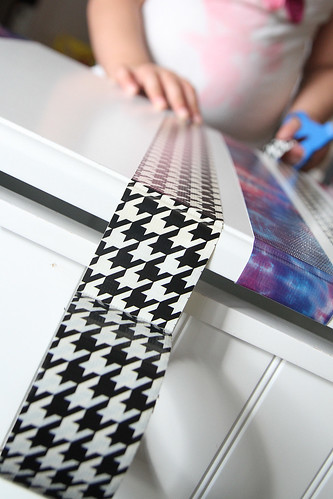
The tape's edges on the back of the chest don't show, and don't need to be perfectly straight. Little Miss trimmed them all by herself:
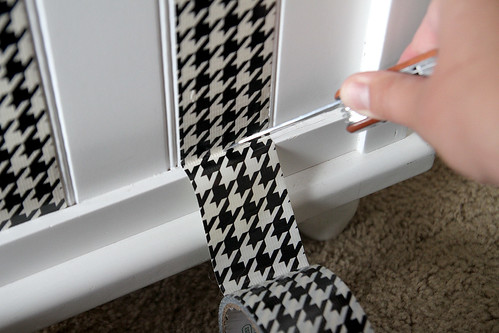
The edges on the front and sides, though, needed to be cut a little more precisely. We elected to use a pocket knife to cut the tape. A box cutter would have worked well, too.
Finally, we decided we would put an initial on the front of the chest. I made the initial carefully, while the edges of the tape were lightly adhered to the edge of my dining room table. I just trimmed everything up neatly and stuck the letter A right in the middle.
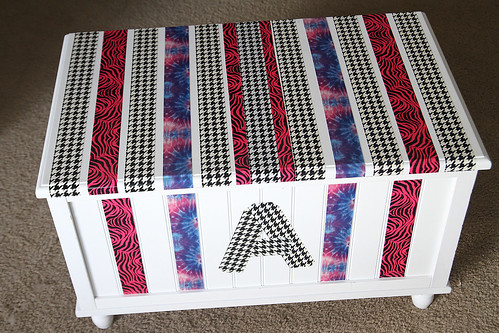
Ta Da!
All done.
The three rolls of duct tape cost us about $12, but there was plenty left for other projects, like these adorable flower pencils!
No comments:
Post a Comment